Venetian plaster gives a space an elegant and luxurious feel with its polished finish. But just like any other surface, it needs proper cleaning to stay beautiful and last long. Here, we’ll explain the best ways to clean Venetian plaster without harming it.
Venetian plaster is a special wall treatment made of several layers of slaked lime and marble dust. It’s applied in thin layers and then polished to get a glass-like sheen. So, cleaning this delicate surface needs gentle care and attention.
Start off by removing dust and debris with a soft-bristle brush or a microfiber cloth. Don’t use harsh materials or chemicals, as they can damage the plaster. Pick mild, pH-neutral cleaners made for delicate surfaces instead.
Mix a small amount of the cleaner with warm water in a bucket. Use a soft sponge or cloth with the solution to wipe down the plaster. Take care not to press too much or scrub violently, since it can cause scratches or remove the topcoat.
When done, rinse the sponge or cloth to take away any cleaner left. Squeeze out extra water before wiping the plaster again to make sure no wetness remains. Lastly, use a dry microfiber cloth to buff the surface softly and restore its original shine.
Pro Tip: To keep Venetian plaster looking great, regular maintenance is essential. Consider applying a wax-based sealer every couple of years to shield the surface from daily wear-and-tear and stains.
What is Venetian Plaster?
Venetian plaster is an ancient art form, hailing from Rome and named for its birthplace in Venice. Cleaning it requires special attention; abrasive cleaners and scrub brushes can harm its delicate surface. To clean, dust or vacuum away dirt, dampen a soft cloth with a cleaner made for Venetian plaster, and wipe in a circular motion – avoiding too much pressure. Applying a protective wax or sealer periodically will help maintain the finish.
This technique has a long history of luxury and elegance, featured on some of the most prestigious buildings and palaces. Today, its timeless beauty is cherished and enjoyed in many homes. Keep your Venetian plaster looking like new with regular cleaning and maintenance!
Benefits of Venetian Plaster
Venetian plaster has lots of perks that make it an excellent choice for interior design projects. Its luxurious and elegant look adds a touch of sophistication to any space. Plus, it’s highly durable and long-lasting, ensuring your walls stay beautiful for years. Additionally, there are many color options, allowing you to create the perfect atmosphere.
Moreover, Venetian plaster has unique features. Its smooth and polished texture makes a visually stunning focal point. Plus, its application involves layering thin coats of plaster, resulting in a seamless finish that hides wall imperfections.
A tip when using Venetian plaster is to follow the manufacturer’s instructions for cleaning and maintenance. Regular dusting with a soft cloth or vacuuming with a brush attachment can help maintain its condition. Avoid using abrasive cleaners or materials that may damage the delicate surface. Cleaning Venetian plaster requires specific materials, patience, and remembering mistakes happen – like the time I accidentally made modern art on my wall.
Materials Required for Cleaning Venetian Plaster
Venetian plaster requires specific materials for cleaning. Here are five essentials:
- A soft cloth or sponge: To gently wipe away dust and dirt without scratching the surface.
- Warm water: Used as a non-abrasive cleaning agent. It should be applied with caution to avoid excessive moisture on the plaster.
- Neutral pH cleaner: Recommended for tougher stains. Make sure it is suitable for use on Venetian plaster to prevent damage.
- Mild detergent: Can be used sparingly for stubborn stains. Dilute it in warm water and test it on a small, inconspicuous area first.
- Microfiber cloth: Perfect for buffing and drying the plaster after cleaning, leaving a streak-free and polished finish.
Additionally, it’s important to note that abrasive cleaners, acidic substances, and rough scrub brushes should be avoided to prevent damage to the delicate surface of Venetian plaster.
To ensure a thorough cleaning, pay attention to hard-to-reach areas, such as corners and edges, using specialized tools like soft-bristle brushes or cotton swabs. This extra attention to detail will maintain the integrity and longevity of the plaster.
To maintain the beauty of the Venetian plaster, it is recommended to regularly dust the surface with a soft cloth or dry mop. This prevents dirt buildup, allowing the plaster’s natural luster to shine through.
Remember to always follow the manufacturer’s instructions for cleaning and maintenance of Venetian plaster to preserve its beauty and durability.
Cleaning Venetian plaster is like trying to teach a cat to swim – it’s a messy challenge that requires patience and a soft touch.
Soft Dusting Brush
A soft dusting brush is essential for cleaning Venetian plaster surfaces. Its soft bristles remove dust and dirt without damaging the delicate plaster finish. Here are some things to know about the soft dusting brush:
- Soft Bristles: These bristles trap and remove dust from Venetian plaster surfaces. They won’t scratch or mark the plaster, so it stays looking perfect.
- Versatile: The brush can be used on walls, ceilings, and decorative moldings covered with plaster. It’s suitable for both large and small areas.
- Comfy Handle: Its handle is ergonomic, making it easy to maneuver in tight spots without strain.
This brush is designed especially for Venetian plaster surfaces. It cleans effectively, leaving behind a pristine finish.
For example, one homeowner had Venetian plaster in their living room and couldn’t keep it clean. After researching, they bought a soft dusting brush. Now, they can keep their plaster clean and blemish-free without much effort.
Microfiber Cloths
Microfiber cloths are a must-have for cleaning venetian plaster. They’re a blend of polyester and nylon, creating a texture to trap dirt and dust. Plus, they’re ultra-absorbent, gentle and lint-free. Electrostatic properties attract dust like magnets. Use them wet or dry for versatile cleaning. Plus, they’re reusable and eco-friendly.
They come in different sizes and colors, too. Color-code them to avoid cross-contamination. To make them last longer, wash separately and don’t use fabric softener. Cleaning Venetian plaster is easy!
Mild Soap or Cleaner
To clean Venetian plaster, use mild soap or cleaner. This will help remove dirt, grime, and stains without causing damage. Here are three key points to consider:
- Select a gentle soap or cleaner designed for delicate surfaces like plaster.
- Dilute the soap or cleaner according to instructions. Using it undiluted could result in residue or streaks.
- Gently clean the plaster in circular motions with a soft cloth or sponge.
Be mindful of cleaners with abrasive ingredients. Read product labels carefully before using a cleaner. For effective cleaning and preservation:
- Conduct a patch test.
- Use gentle strokes during cleaning.
- Rinse off residue with clean water & sponge.
Follow these suggestions to maintain the beauty and longevity of your Venetian plaster. Spice up with warm water for a fabulous finish!
Warm Water
Warm water is a must for cleaning Venetian plaster. Its tepid temperature helps to loosen dirt and grime without damaging the delicate surface. Plus, warm water acts as a natural solvent, taking out stains and residue.
To clean Venetian plaster with warm water:
- Dampen a soft cloth/sponge with the heated liquid and gently wipe down the surface. Be careful not to scrub too hard, or you might scratch or discolor the plaster.
- The warmth of the water makes it easier for it to get into the small pores of the plaster, giving a thorough clean.
Using warm water is also vital for the durability and longevity of the plaster. It helps stop the build-up of dirt and debris that can harm the plaster over time. By using warm water regularly, you can make your Venetian plaster last longer and keep its look.
Don’t forget this important step! Warm water is not only a great cleaning method, but it’s also a way to protect your Venetian plaster. Embrace this practice and enjoy its beauty for years to come!
Preparing the Area for Cleaning
When it comes to getting your Venetian plaster clean, one important step is preparing the area for cleaning. This involves taking certain precautions and making sure the space is ready for the cleaning process. Here are six steps to follow in order to properly prepare the area for cleaning:
- Remove any furniture or objects from the space to ensure easy access to the walls.
- Cover the floor and any remaining furniture with protective sheets or drop cloths to prevent any damage or staining during the cleaning process.
- Inspect the walls for any loose or damaged plaster and make necessary repairs before cleaning.
- Use a soft brush or cloth to gently remove any dust, dirt, or debris from the surface of the plaster.
- If there are any stains on the plaster, apply a mild cleaning solution specifically designed for Venetian plaster and gently scrub the affected areas.
- After cleaning, allow the walls to dry completely before moving on to the next step.
In addition to these steps, it’s important to note that Venetian plaster is a delicate material, so it’s crucial to take extra care and avoid using any abrasive cleaners or harsh scrubbing tools that could damage the surface. By properly preparing the area for cleaning, you can ensure that your Venetian plaster remains in pristine condition for years to come.
Now that you have learned how to prepare the area for cleaning your Venetian plaster, it’s time to take action. Don’t miss out on the opportunity to restore the beauty of your walls and maintain their elegance. Follow the steps outlined above and enjoy your clean and vibrant Venetian plaster.
Clear the way, furniture! It’s time for the Venetian plaster to shine, and it’s not afraid to paint the town!
Removing Furniture and Decorations
Let’s start creating a pristine space! Follow these simple steps to remove furniture and decorations:
- Start with small stuff: Take out decor, books and accessories to give more room for the bigger pieces.
- Protect delicate items: Put furniture pads or blankets on delicate surfaces before moving large furniture.
- Ask a friend: Heavy items are hard to manage alone. Ask someone to lend a hand and make it easier and safer.
- Disassemble: Certain pieces may need to be taken apart before removal. Check instructions or consult a professional if you’re unsure how to do it right.
- Lift properly: When lifting heavy objects, bend your knees, not your back. Keep your back straight and use your leg muscles to lift.
Plus, consider these tips:
- Make a storage area for furniture and decorations.
- Clean each item before keeping.
- Take inventory of what you’ve removed.
- Label boxes or covers when storing to keep them organized and secure.
By following these steps and tips, you can remove furniture and decorations with ease and no risk of damage or injury. So go ahead and get to transforming your space into a pristine one!
Covering the Floor and Surrounding Surfaces
For protecting your floor, there are several options. Drop cloths and plastic sheets are a popular choice. Just spread them out and you have a strong surface to work on. Or, use thick paper or cardboard. It shields the floor and soaks up any spilled liquids.
To save any accidental damage, protect walls, furniture, and anything near the cleaning area. Plastic sheeting or painter’s tape can act as a barrier.
For decades, covering floors and surfaces has been a staple in professional cleaning. It was designed to guard pricey flooring and make post-cleaning easier. Since then, more efficient and effective methods have been created.
Dusting the Venetian Plaster
Dusting the Venetian Plaster is an essential step in maintaining its pristine appearance. To remove dust and dirt from the surface, follow these four simple steps:
- Use a soft-bristle brush or a microfiber cloth to gently sweep away loose dust particles from the Venetian Plaster. Avoid using abrasive materials that may scratch or damage the surface.
- For hard-to-reach areas, such as corners or intricate designs, a small soft brush or a vacuum with a brush attachment can be used. Be careful not to press too hard to prevent any accidental damage.
- If there are stubborn stains or marks on the Venetian Plaster, slightly dampen a soft cloth with water and gently wipe the affected area. Avoid using any harsh cleaning solutions or chemicals as they may degrade the plaster’s finish.
- After dusting the Venetian Plaster, allow it to thoroughly dry before continuing with any further cleaning or maintenance tasks. This will ensure that the surface remains intact and free from any moisture-related issues.
It is worth noting that repeated dusting can help prevent the accumulation of dirt and debris, preserving the beauty and longevity of the Venetian Plaster.
Interestingly, Venetian Plaster has a rich history that dates back to ancient Rome. Known for its distinctive marble-like appearance, it was originally used to decorate palaces and other grand buildings. The craft of applying Venetian Plaster has been passed down through generations, with skilled artisans using traditional techniques to create stunning finishes that continue to be admired today.
Don’t let the dust settle on your Venetian plaster – using the soft dusting brush is the key to keeping it cleaner than your dark secrets.
Using the Soft Dusting Brush
A soft dusting brush is a must-have for cleaning Venetian plaster. Its gentle touch ensures that the surface remains unscratched and undamaged during the cleaning process.
The bristles of the brush penetrate crevices and hard-to-reach areas, easily capturing dust particles. It’s also effective at removing cobwebs and other small particles.
Regular cleaning with a soft dusting brush can help to maintain the beauty of Venetian plaster. It keeps it free from dirt and debris, ensuring that it looks its best.
My friend used a soft dusting brush to clean her Venetian plaster living room. The results were stunning! All the dust was removed, allowing the true beauty of the plaster to shine through.
Removing Loose Dirt and Debris
- Start by prepping the area. Take away any furniture or objects near the plaster to avoid them from becoming dusty.
- Utilize a soft-bristle brush or a vacuum cleaner with a brush attachment to carefully remove dirt and debris from the plaster’s surface. Be careful not to press too hard to avoid damage.
- For hard-to-remove dirt or stains, lightly dampen a microfiber cloth or sponge with warm water. Wipe the spot in a circular motion, being certain not to saturate the plaster with too much water.
- If there are still remains of dirt or debris, mix a mild soap with warm water. Dampen a clean cloth in the solution and wring out the extra liquid. Again, wipe the surface with circular motions until it is clean.
- Once you have eliminated all visible dirt and debris, let the plaster dry completely before continuing with any other treatments or repairs.
- It is important to remember to never use too much force or harsh cleaning agents, as this can harm the delicate Venetian plaster finish. Test any cleaning product on an inconspicuous area first and follow the manufacturer’s instructions for the best results.
Pro Tip: Regularly dusting your Venetian plaster surfaces is important to prevent dirt and debris buildup, extending its lifetime and maintaining its beautiful appearance for years.
Preparing the Cleaning Solution
Preparing the Cleaning Solution for Venetian Plaster
To ensure proper cleaning of Venetian plaster, follow these steps:
- Gather the necessary cleaning supplies.
- Dilute a mild detergent in warm water, using the ratio recommended by the manufacturer.
- Mix the cleaning solution gently to avoid creating excessive suds.
- Wet a soft sponge or cloth in the cleaning solution.
- Squeeze out any excess liquid, ensuring the sponge or cloth is damp and not dripping.
Unique details to remember when preparing the cleaning solution:
- Avoid using harsh chemicals or abrasive cleaners, as they can damage the delicate surface of Venetian plaster.
Suggestions for effective cleaning and their rationale:
- Start cleaning from the top and work your way down to prevent streaks and drips from forming.
- Use gentle, circular motions when cleaning to avoid disrupting the textured finish of the plaster, ensuring an even clean.
By following these steps and suggestions, you can effectively prepare the cleaning solution for Venetian plaster and maintain its pristine appearance.
Cleaning Venetian plaster: a process that requires soap, water, and the hope that your walls don’t decide to mock your cleaning efforts by smearing it all over again.
Mixing Mild Soap or Cleaner with Warm Water
Mix the mild soap or cleaner with warm water – it’s key for a successful cleaning solution! Here’s a 5-step guide to help:
- Pick Mild Soap or Cleaner: Get a gentle soap or cleaner made for cleaning. Avoid harsh chemicals that can damage surfaces you plan to clean.
- Grab Warm Water: Fill a bucket or container with warm, but not too hot, water.
- Add Soap/Cleaner: Pour the right amount into the warm water. Measurements on the packaging should be followed.
- Blend Thoroughly: Use a stirring tool like a spoon or whisk and mix the soap or cleaner into the water with circular motions. Keep stirring ’til there’s no clumps left.
- Test and Adjust: Before cleaning, try the mixture on a small area to check compatibility with the surface material. If all’s good, you can adjust the strength of your solution by adding more soap/cleaner for tougher stains or diluting with water if needed.
Preparing the right cleaning solution can give you great cleaning results without damaging your belongings or surfaces.
Follow these steps for efficient results! Who needs harsh chemicals when you can clean like a boss with just a spatula and a can of whipped cream? Start making your own cleaning solutions today and enjoy a spotless and hygienic environment that’s good for your wellbeing!
Avoiding Harsh Chemicals
Ditch harsh chemicals and go green! Here’s a simple 3-step guide to make your own cleaning solution.
- Natural Ingredients. Instead of store-bought, use eco-friendly natural ingredients like vinegar, lemon juice, baking soda, and essential oils. Plus, they leave a refreshing scent.
- DIY Recipes. Search the internet for recipes and follow instructions carefully.
- Test & Adjust. Do a patch test before using on multiple surfaces. Different materials may react differently to certain ingredients. Make adjustments if needed.
By using natural ingredients you help the environment, save money, and maintain a healthy home. Be informed about potential risks before incorporating ingredients into your cleaning efforts. With creativity and resourcefulness, you can keep your home chemical-free and protect yourself and the planet.
Cleaning the Venetian Plaster
Cleaning Venetian Plaster: A Professional Guide
To clean Venetian plaster effectively, follow these three simple steps:
- Dusting: Begin by dusting the surface of the Venetian plaster gently with a soft, lint-free cloth. This step will remove any loose dirt or debris without causing any damage to the delicate plaster finish.
- Mild Cleaning Solution: Mix a mild cleaning solution using warm water and a gentle soap or a specialized Venetian plaster cleaner. Avoid using harsh chemicals or abrasive cleaners that can damage the finish. Dip a soft sponge or cloth into the cleaning solution and wring it out thoroughly. Gently wipe the surface of the Venetian plaster, being careful not to apply excessive pressure.
- Drying: After cleaning, ensure the Venetian plaster is completely dry. Use a clean, dry cloth to remove any excess moisture and promote faster drying. It is important to avoid leaving any water spots or streaks on the surface.
For unique details, remember to avoid using rough scrub brushes or abrasive cleaning tools that can scratch or damage the Venetian plaster. Additionally, refrain from using excessive water or cleaning solution to prevent the plaster from becoming saturated or discolored.
Pro Tip: It is recommended to test the cleaning solution on a small, inconspicuous area of the Venetian plaster before applying it to the entire surface. This will ensure that the solution does not cause any adverse reactions or discoloration.
Get your cloth damp, but not as damp as your failed attempts at sarcasm during family gatherings.
Dampening a Microfiber Cloth
To clean Venetian plaster effectively, dampen a microfiber cloth. Here’s how:
- Get a cloth: Pick a microfiber cloth made for delicate surfaces.
- Get distilled water: Fill a spray bottle with distilled water to prevent mineral buildup.
- Get it damp: Spritz the cloth with water until lightly damp, not soaking wet.
- Test it: Before cleaning, test the cloth in a spot that won’t show.
- Start wiping: Use light circular motions to wipe the plaster.
Be careful! Using too much water or pressure can damage Venetian plaster. Also, avoid cleaning agents and chemicals since they may strip away its finish.
Just dust and dry wipe regularly to keep it looking great without damp cleaning.
Did you know? According to The Craftsman Blog, acidic and abrasive cleaners can etch and harm Venetian plaster. Why use a feather duster when you can be like a secret agent and clean with a microfiber cloth?
Gently Wiping the Surface
Maintaining a pristine Venetian plaster appearance requires gentle wiping. Use a soft cloth or sponge with water. Glide it in smooth, circular motions without applying too much pressure – this could damage the texture.
Rinse your cloth or sponge often and wring out the excess water. This prevents dirt and grime from spreading and causing streaks.
Harsh chemicals or abrasive cleaners should never be used as they can harm the natural finish. Stick to mild soapy water or neutral cleaning solutions.
Be quick with spills and stains as the porous material can discolor permanently. Blot the liquid with a clean cloth. Don’t rub it!
Regularly wiping the plaster will preserve its lustrous finish for years. Don’t miss out on this simple yet effective routine. To remove stubborn stains, patience and precision are key.
Removing Stubborn Stains
Tired of those pesky stains on your Venetian plaster? Check out these 6 simple steps for a clean, refreshed finish!
- Shield the area: Protect other surfaces with plastic or drop cloths to prevent further damage.
- Create a mild solution: Mix warm water and a gentle detergent.
- Test it: Try the solution on a hidden spot to make sure it won’t discolor or damage.
- Scrub gently: Use a soft sponge or cloth and lightly scrub the stain in circles, using light pressure until it fades.
- Rinse: Once the stain’s gone, rinse the area with clean water to remove residue.
- Dry and inspect: Let the surface air-dry and check for any remaining stains. Repeat the process if necessary, or get professional help.
Act fast when dealing with stains on Venetian plaster. The sooner you take care of them, the easier it will be to remove them without any damage. Also, consult the manufacturer’s guidelines for specific instructions tailored to your product.
Drying and Finishing
Drying and Finishing:
After completing the application of Venetian plaster, it is important to properly dry and finish the surface for optimal results. This process involves allowing the plaster to cure completely and then applying a specialized finishing technique to achieve the desired texture and sheen.
To better understand the steps involved in drying and finishing Venetian plaster, refer to the following table:
| Step | Description |
|---|---|
| Curing | Allow the plaster to dry naturally for at least 24 to 48 hours, depending on the climate and thickness of the application. |
| Sanding | Gently sand the dried plaster surface using fine-grit sandpaper to remove any imperfections and create a smooth base for the finishing process. |
| Polishing | Employ a polishing compound and a soft cloth to gently buff the surface, enhancing its shine and smoothness. |
| Waxing | Apply a high-quality wax specifically designed for Venetian plaster to protect and enhance the finish. |
| Sealing | Finally, seal the plaster with a sealer or topcoat to ensure long-lasting durability and to provide additional protection. |
It is crucial to note that variations in technique and application may exist, depending on the specific type and brand of Venetian plaster being used. However, the general process of drying and finishing remains consistent.
Unique details to consider during the drying and finishing process may include the choice of sandpaper grit, the type of polishing compound used, and the desired level of shine and smoothness. These factors can greatly impact the final outcome of the plaster’s appearance.
One true story that exemplifies the importance of proper drying and finishing involves a homeowner who applied Venetian plaster to their walls but failed to allow sufficient drying time. As a result, the plaster did not fully cure and developed cracks and blemishes over time. This experience highlights the necessity of adhering to the recommended drying and finishing process to ensure a flawless and durable finish.
Air drying the surface is like watching paint dry, except with Venetian plaster you get to enjoy the anticipation of your walls looking effortlessly elegant.
Air Drying the Surface
Air drying surfaces is a natural process that’s used in many industries. Here’s a guide to how it works:
- Clean the surface. Dust, dirt, and other contaminants can stop it from drying properly.
- Make sure there’s good ventilation. Airflow helps the evaporation of moisture.
- Protect from direct sunlight. Direct sunlight exposure can cause uneven drying and damage.
- Be patient. Don’t rush the process – wait until it’s entirely dry.
- Monitor progress. Regularly check for any signs of moisture or dampness.
Plus, air drying offers more refined finishes on surfaces such as wood, fabrics, and ceramics. A study in the “Journal of Material Science” even found that air drying increases the durability and longevity of painted surfaces compared to artificial methods like heat drying and forced-air technology.
Impress your friends with your dry microfiber buffing skills – it’s like giving a grumpy metalhead a shiny makeover!
Buffing with a Dry Microfiber Cloth
- To give your surfaces a flawless finish, use microfiber cloths. These specialized cloths remove residue and bring out the shine. Here’s how to buff with one:
- Make sure it’s clean – check your cloth for dirt and debris. This stops scratches.
- Fold it – create a small, manageable size. This gives better control and precision.
- Use gentle pressure – place it on the surface and move in circles. This polishes and restores the shine.
- Change sides often – rotate the cloth and use different sections for each pass. This keeps the cloth clean and prevents spreading residue.
- Repeat if needed – keep buffing until you get the desired result.
For an impeccable finish, use multiple microfiber cloths. Start with one for initial cleaning, then switch to another for final polishing. Mastering the art of buffing with a dry microfiber cloth leaves surfaces looking brilliant and spotless!
Maintaining the Clean Venetian Plaster
To maintain the pristine condition of Venetian plaster, follow these simple steps:
- Regular Dusting: Use a soft brush or a microfiber cloth to gently remove dust from the surface of the Venetian plaster. This will prevent the accumulation of dirt and maintain its smooth texture.
- Mild Cleaning Solution: Mix a mild detergent or soap with warm water to create a gentle cleaning solution. Dampen a soft cloth with this solution and carefully wipe the plaster surface, ensuring not to apply too much pressure.
- Avoid Harsh Chemicals: Refrain from using abrasive cleaners, solvents, or chemicals on Venetian plaster. These substances can damage the delicate finish and alter its appearance.
- Sealant Application: Consider applying a protective sealant to enhance the longevity of the Venetian plaster. This can be done by following the manufacturer’s instructions and using a suitable sealant for the type of plaster used.
Additionally, it is essential to inspect the plaster periodically for any signs of damage, such as cracks or chips. Promptly address these issues to prevent further deterioration. By properly maintaining your Venetian plaster, you can enjoy its aesthetic appeal for years to come.
Fun Fact: Venetian plaster, also known as polished plaster, dates back to ancient Rome and was widely used in Venetian architecture during the Renaissance period.
If you find yourself dusting Venetian plaster more often than vacuuming your own sanity, then you’re officially a cleaning guru.
Regular Dusting and Cleaning
Dust your Venetian plaster regularly with a microfiber cloth or feather duster to prevent dust buildup. For deeper cleaning, mix a mild soap solution with warm water and use a clean cloth. Be careful not to apply too much pressure or scrub. Avoid abrasive cleaners or harsh chemicals – stick to mild soaps and gentle techniques. If there are stubborn stains, ask a pro for help.
Pay extra attention to delicate decorations and intricate designs – use soft brushes or cotton swabs as needed. For added protection, consider applying a wax or sealant. Cleanings will be easier and dirt & stains won’t stand a chance!
Don’t use a sledgehammer – they don’t serve tea!
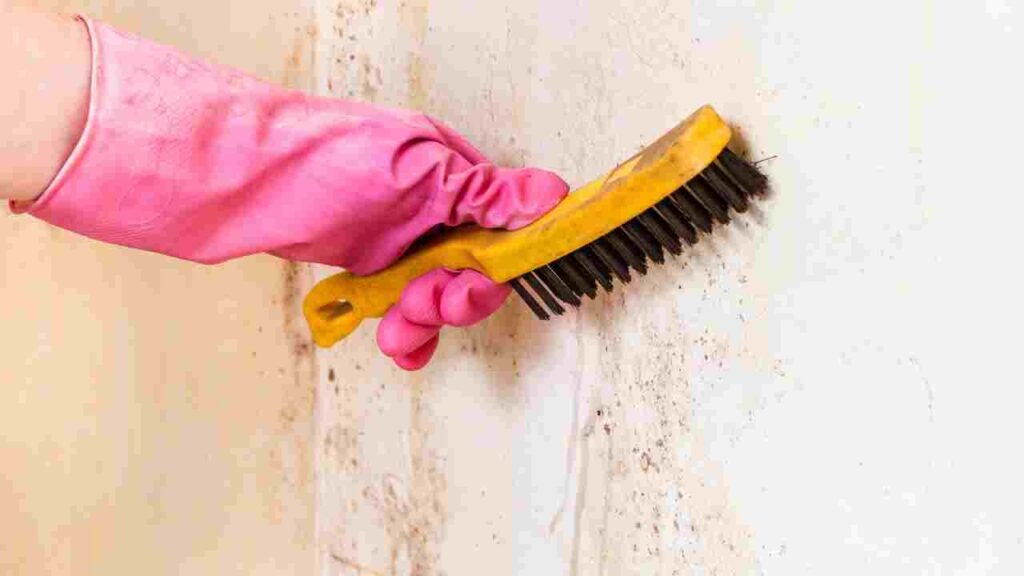
Avoiding Abrasive Materials and Harsh Cleaners
Use soft, non-abrasive cloths or towels when cleaning the plaster. No harsh brushes or scouring pads – they can damage the delicate texture. Opt for gentle, pH-neutral cleaners specifically designed for Venetian plaster. Stay away from bleach and acidic cleaners – they can discolor and deteriorate the plaster. Always test a small area before using any cleaner to avoid negative effects.
Remember, abrasive materials and harsh cleaners can ruin the look of your plaster as well as its durability. Follow these guidelines for a pristine look that lasts.
Fun Fact: Venetian plaster has been used for centuries to create marble-like finishes. Save time and energy maintaining your plaster – cocktails by the canal instead?
Conclusion
Cleaning Venetian plaster is tricky. Use the correct tools and clean with caution – avoid abrasive substances as they may ruin the finish.
To protect your plaster, remember: prevention is essential. Dust regularly and be careful with sharp objects. Additionally, use a protective sealant to shield it from scratches and stains.
Be aware that Venetian plaster is not suitable for high-moisture areas, such as bathrooms and kitchens. The humidity causes the plaster to soften or deteriorate. So, opt for alternative materials in those spaces.
John Lum, an interior designer, recommends against using Venetian plaster in bathrooms. It is too vulnerable to moisture.
Follow these tips and take care of your Venetian plaster. Doing so will keep it looking beautiful for years!
Frequently Asked Questions
FAQs on How to Clean Venetian Plaster:
1. How often should I clean Venetian plaster?
It is recommended to clean Venetian plaster every 6-12 months to maintain its appearance. However, high-traffic areas might require more frequent cleaning.
2. What cleaning supplies should I use?
Use mild, non-abrasive cleaners specifically designed for Venetian plaster. Avoid using harsh chemicals or abrasive scrub brushes that can damage the plaster’s surface.
3. How do I remove stains from Venetian plaster?
Gently blot the stained area with a clean, damp cloth. If the stain persists, use a mild soap solution and gently rub the area in a circular motion. Avoid excessive scrubbing to prevent damaging the plaster.
4. Can I use water to clean Venetian plaster?
Yes, you can use water to clean Venetian plaster. However, it’s important to dampen a soft cloth or sponge with water and wring it out thoroughly before wiping the surface. Excess water can cause streaks or damage the plaster.
5. How should I dry Venetian plaster after cleaning?
After cleaning, use a soft, dry cloth to gently pat the surface dry. Avoid rubbing too hard as it can create dull spots or uneven texture. Allow the plaster to air dry completely before any further maintenance or touch-ups.
6. Are there any preventive measures to keep Venetian plaster clean?
Yes, you can take some preventive measures to keep Venetian plaster clean. Regularly dusting the surface with a soft cloth or using a soft-bristle brush can help remove dirt and prevent it from settling into the plaster. Additionally, avoid placing objects directly on the plaster to prevent scratches or marks.
