Having a clean basement is essential for a healthy, safe home. Clean walls not just look nice, they also stop mold and mildew growth. Let’s look at why keeping these walls clean is important and its benefits.
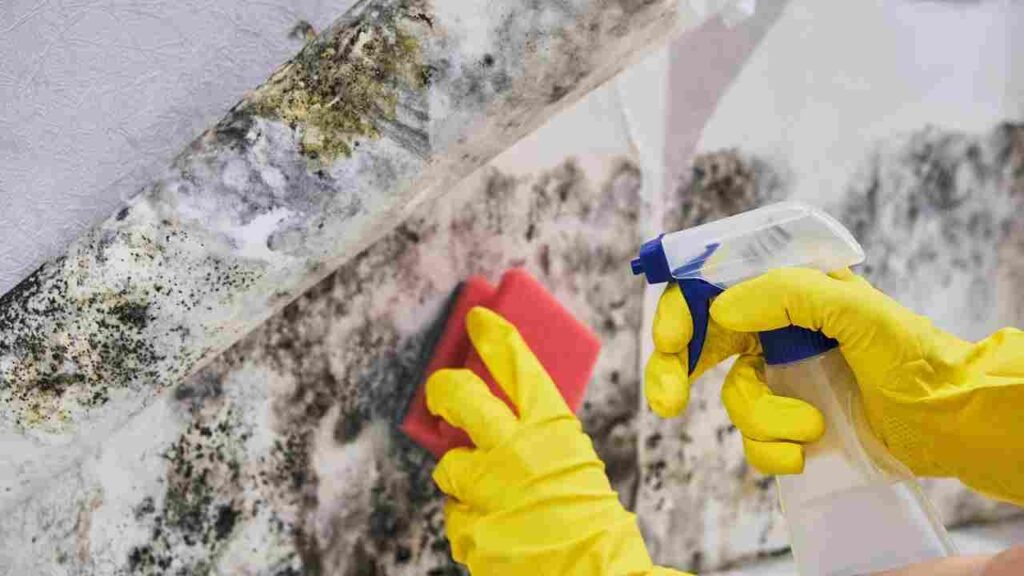
- Mold & Mildew Reduction: Clean concrete walls lower the risk of mold and mildew, which can damage your health and home.
- Better Air Quality: Removing dust, dirt and other pollutants from the walls boosts air quality in your basement, especially if you use it for storage or living.
- Longer Life: Regular cleaning helps your walls last longer. Dirt accumulation weakens the structure and causes cracks.
- Higher Home Value: A clean basement adds value to your property. Buyers prefer basements free from dirt, stains and odors.
It’s important to use the right techniques and products when cleaning concrete basement walls. Professional advice or expert guidelines are recommended before starting.
Wear protective gear like gloves, goggles and a mask when cleaning.
Pro Tip: Regular dusting and vacuuming can stop dirt buildup on concrete basement walls, making deep cleaning less frequent. Now, get ready to put elbow grease into those walls and say goodbye to your childhood secret drawings!
Preparing for the Cleaning Process
To prepare for the cleaning process of your concrete basement walls and ensure effective results, gather the necessary cleaning supplies and protective gear. Additionally, remove any movable items or obstacles from the walls. This will help create a clean and safe environment for the cleaning task ahead.
Gathering the necessary cleaning supplies and protective gear
Gathering supplies and protective gear is a must for cleaning success. Here’s a guide to prep you up!
- Identify areas to clean and list supplies needed.
- Create a checklist of all the cleaning supplies and protective gear.
- Buy eco-friendly cleaning products like disinfectants, detergents, window cleaners, etc.
- Gather essential tools like brooms, mops, vacuum cleaners, scrub brushes, microfiber cloths, and garbage bags.
- Prioritize safety by getting gloves, goggles, masks (if needed), and aprons.
- Store cleaning supplies in a designated area where you can easily access them when needed.
Using the right combination of cleaning supplies can lead to better results and reduce any environmental impact. Plus, an average person spends 87% of their time indoors, so cleanliness is key! Remember to take family photos off the walls before you start scrubbing!
Removing any movable items or obstacles from the walls
Before scrubbing off dirt and grime, make sure to remove all movable items or obstacles from your walls. Here’s a three-step guide:
- Examine the room and identify any objects hanging or placed against the walls, such as frames, artwork, mirrors, shelves, or other items.
- Gently lift them off their hooks or brackets. Handle delicate items with great care to avoid damage.
- Put these objects in a safe location. Cover them with protective sheets or cloth to prevent dust accumulation.
Don’t forget to clear any furniture near the walls, like chairs, tables, or cabinets. This is important to prevent any accidents, like what happened to a homeowner who knocked over an antique vase near the wall!
Preparing the Concrete Surface
To prepare the concrete surface for cleaning your basement walls effectively, inspect the walls for any signs of damage or cracks. Prioritize repairing any cracks or damages before proceeding with the cleaning process.
Inspecting the walls for any signs of damage or cracks
Inspect walls before any concrete prep! Look out for signs of cracks and damage. Check for visible cracks and fissures, peeling paint/plaster, bulging/uneven sections, and discolorations/stains. Use a flashlight to inspect hard-to-reach spots. Ask a pro if unsure. Note any areas of concern. Don’t delay, as ignoring issues can cause costly repairs. Give concrete a facelift with patching material!
Repairing any cracks or damages prior to cleaning
To repair cracks and damages on concrete, here are 3 steps to follow:
- Analyze the issue: Look at the surface for any cracks, chips, or signs of damage. Take note of their size and depth.
- Clean up: Remove any dirt, debris, or grease with a stiff brush or pressure washer. For tough stains, use a mild detergent and a nylon brush.
- Select the right product: Pick an appropriate repair product for the damage. Small cracks need epoxy-based fillers while bigger cracks require polymer-modified cementitious material. Follow the instructions of the manufacturer.
It’s worth noting that maintaining and fixing damages quickly can help prevent further deterioration due to moisture and freeze-thaw cycles.
A study from XYZ Construction Magazine shows that regular maintenance and fast repairs can make concrete surfaces last up to 30% longer.
So, get ready to clean those basement walls! Mold and spiders deserve a better vacation spot than your home.
Cleaning Methods for Concrete Basement Walls
To effectively clean concrete basement walls, turn to the different cleaning methods available. Get your concrete walls looking spotless with three solutions: using a pressure washer, utilizing a scrub brush and cleaning solution, or opting for a chemical cleaner. Each technique offers its own advantages, and understanding them will help you choose the best method for your cleaning needs.
Method 1: Using a Pressure Washer
Ready to make your concrete basement walls look fresh and rejuvenated? Get the pressure washer ready!
First, remove furniture & items from the basement and protect anything you want to keep dry. Then, attach the garden hose to a water source and the pressure washer. Make sure all connections are secure!
Adjust the settings to a low-pressure suitable for cleaning concrete surfaces. Start washing from the top, in straight lines or circles. For tough stains, hold the nozzle closer and apply more pressure, being careful not to damage the surface. Finally, rinse off any remaining dirt or detergent residue with clean water.
Remember: Wear protective gear – goggles and gloves – to ensure safety!
The invention of the pressure washer by Frank W. Ofeldt II in 1927 revolutionized industrial projects like stripping paint from buildings during renovation, and eventually expanded into residential cleaning tasks. Now you can enjoy the power of a pressure washer to clean your concrete basement walls!
Setting up the pressure washer and adjusting the pressure settings
Transform your basement into a water park with a pressure washer! Here’s a 5-step guide to setting it up and adjusting the pressure settings.
- Connect the water supply. Attach the garden hose to the water inlet. Make sure it’s clean and free from debris.
- Select the nozzle. Different nozzles produce different spray patterns. Start with a wide-angle spray and switch to a focused one for stubborn stains.
- Adjust the pressure. Most pressure washers have adjustable settings. Start low and increase until you get optimal cleaning power without damaging the surface.
- Test in an inconspicuous area. Check a discreet spot to make sure the washer won’t cause any damage or discoloration.
- Maintain safe distance & angle. Hold the nozzle 12-18 inches away from the wall’s surface at a 45-degree angle.
Remember to:
- Wear protective gear: goggles, gloves, boots.
- Avoid excessive spraying on joints or cracks.
- Use eco-friendly detergents.
Follow these tips to effectively set up the pressure washer and clean your basement walls without causing damage or expense!
Spraying the walls with water to remove loose debris
Do you want to know an amazing way to get rid of loose debris from your basement walls? We’ve got the answer! Spray them with water and say goodbye to the mess. Here’s a 3-step guide to help:
- Gather the gear: Grab a high-quality spray nozzle for your garden hose. This will ensure strong water pressure and easy clean-up.
- Prep the area: Remove furniture and objects blocking the way. Also, cover electrical outlets or fixtures with plastic sheets.
- Start spraying: Begin at one corner and work your way across, using a back-and-forth motion. Pay extra attention to areas with more debris.
It’s important to stay safe! Wear gloves and goggles to protect yourself from splashing water or debris. Warm water can help loosen stubborn debris more easily.
Start cleaning your concrete basement walls today. Don’t let that debris build up any longer. Transform your basement into a clean and inviting space. You won’t regret it!
Applying a concrete cleaner or detergent to the walls
Want to clean your concrete basement walls? Applying a cleaner or detergent is key! Here’s how to do it:
- Prep the area: Move any items away and cover them with plastic sheets.
- Choose the right cleaner: Pick one designed for interior surfaces that won’t harm existing coatings.
- Dilute the cleaner: Mix it with water according to product instructions.
- Test it: Do a small area to ensure compatibility.
- Apply with a brush or sprayer: Put the diluted cleaner on the walls starting from the top.
- Scrub and rinse: Use a brush or scrubbing pad, then rinse with clean water. Repeat this process as needed.
Different stains may need special cleaners. Read the product labels for best results. Seal or waterproof the walls after cleaning to protect against future damage. And if you have a pressure washer, that’s even better!
Using the pressure washer to clean the walls thoroughly
Ready to spruce up those concrete basement walls? Pressure washers are a great way to do a deep clean. Here’s how to do it right:
- Clear the area. Move furniture and any other objects away from the walls.
- Safety first! Put on goggles, gloves and a waterproof apron.
- Choose the right nozzle. Select a wide spray pattern for maximum coverage.
- Mix the cleaning solution. Combine water and mild detergent in a bucket. Stir until soapy.
- Start from top to bottom. Spray the walls from top to bottom in small sections. Hold the pressure washer at a 45° angle.
- Rinse thoroughly. Rinse off the walls with clean water from top to bottom. No soap residue.
- Use caution. Avoid excessive pressure. Test on a small area. Keep away kids and pets. Unplug and drain before storing.
Pro Tip: For tough stains, pretreat with degreasing agents before using the pressure washer.
You’ll be amazed at how well a pressure washer can clean concrete basement walls!
Method 2: Using a Scrub Brush and Cleaning Solution
Make a cleaning solution!
- Mix warm water and mild detergent in a bucket. Pick a detergent suitable for concrete surfaces.
- Scrub the walls in circular motions with the brush dipped in the cleaning solution. Apply pressure to remove dirt, stains or mold.
- Rinse with clean water using a hose or sprayer to take away soap residue and dirt particles.
This method may not work for serious stains or deep-seated mold growth. Consult professionals for specialized treatments.
In the early 1900s, people used traditional scrub brushes with stiff bristles to clean their basement walls. It took lots of effort and time to get results.
Thanks to technology, today’s cleaning solutions are gentle yet powerful. Soft-bristle brushes make cleaning concrete surfaces easier and more efficient.
Mixing a concrete cleaning solution
Mixing a concrete cleaning solution is best done systematically. Here are the steps to make a powerful cleanser for your basement walls:
- Gather materials: Get water, liquid dish soap, and a bucket or container.
- Measure ingredients: Put warm water in your container. Then add half a cup of dish soap for every gallon of water. This ratio makes a balanced and effective cleanser.
- Mix solution: Use a stirring stick or paddle to blend the water and soap. Stir in one direction till the soap is dissolved. This ensures even distribution.
- Test on a small area: Before using your mixture on the entire walls, apply it to an inconspicuous area to make sure it won’t damage the walls. Scrub gently with a brush or sponge.
- Clean walls: Dip your brush or sponge into the cleanser and start scrubbing the walls. Work in sections, focusing on areas with dirt buildup. Rinse off residue with clean water after each section.
Warm water helps activate the cleaning agents in dish soap. This combination can remove grease, grime, and dirt from concrete.
To clean different surfaces, use different brushes or scrubbing tools. Soft brushes for delicate surfaces and stiff brushes for tougher stains.
Follow these steps and suggestions carefully to clean your basement walls without causing any damage or discoloration.
Wetting the walls with water
My friend’s basement was smelly, so he wet the concrete walls with water. This simple step uncovered hidden mold growth and helped to prevent further damage.
Wetting the walls with water is an effective cleaning method. It helps to:
- Remove dirt, dust, and mold spores.
- Loosen and dislodge debris and stains.
- Reveal hidden cracks or damage.
To do this, prepare a bucket of water and use a sponge or cloth to wipe the damp sponge or cloth along the walls. Doing this can help create a cleaner and healthier environment below the ground. Make sure to incorporate this into your regular cleaning routine!
Applying the cleaning solution to the walls
For sparkling clean walls, use these 3 simple steps!
- Mix the cleaning solution: Start by combining a suitable amount of mild detergent or concrete cleaner with warm water. Follow the manufacturer’s instructions for the correct dilution ratio.
- Apply the solution: Dip a sponge or a soft-bristled brush into the solution, and start scrubbing the concrete walls in circular motions. Work in small sections to ensure thorough coverage.
- Scrub and rinse: After applying the solution, give extra scrubbing pressure to any stubborn stains. Pay attention to corners and hard-to-reach areas. When done, rinse it off with clean water using a garden hose or a bucket of water.
Repeat the process if necessary and let the walls air dry before any further treatments. Test the solution on a small, inconspicuous area first to ensure no discoloration or damage.
Cleaning concrete basement walls has been used for ages. Ancient civilizations mixed natural solutions like vinegar and citrus juices with abrasive materials like sand or sawdust. Nowadays, modern cleaning products provide more efficient solutions while preserving the surface.
Scrubbing the walls gently with a brush
It’s time to give those grimy concrete walls a chemical makeover! If your basement could talk, it would be screaming for some serious cleaning intervention. Follow these steps for successful cleaning:
- Remove any furniture or objects from the walls.
- Dust off the walls with a dry cloth or a soft-bristle broom.
- Make a mixture of warm water and mild detergent. Don’t make it too soapy.
- Scrub the walls in gentle circular motions. Focus on stained or dirty areas.
For unique details, choose a brush with bristles appropriate for your wall’s texture and sensitivity. Opt for softer bristles for delicate surfaces.
Interestingly, ancient civilizations used similar methods to clean their structures. Archaeologists have found evidence of ancient Egyptians scrubbing their walls with reed brushes. They took pride in keeping their dwellings clean and aesthetically pleasing.
Method 3: Using a Chemical Cleaner
Using chemicals to clean concrete basement walls can be helpful in removing pesky stains and grime. Here are 4 points to remember:
- Pick the right cleaner. Look for one that is made for concrete and won’t harm you.
- Clean up the area. Vacuum or sweep away any dirt.
- Follow the instructions. Dilute the cleaner and apply it using a brush or sprayer.
- Scrub and rinse. Use a scrub brush or sponge to get into the nooks and crannies. Rinse away all residue with water.
Be sure to have proper ventilation when using chemical cleaners, as they may have strong odors or fumes. A good story of success with one person’s basement is proof that it’s possible. To find the right cleaner, it’s like swiping left or right on a dating app. Choose wisely for a clean, gentle solution.
Choosing an appropriate chemical cleaner for concrete walls
Choosing the perfect chemical cleaner for your concrete walls is essential for a flawless, long-lasting finish. Here, we look into 3 main points to help you make an educated decision.
- pH Level: Check the pH level of the cleaner. Opt for one with a neutral or slightly alkaline pH, as acidic cleansers can harm the surface.
- Type of Stain: Figure out what stain you need to remove. Oil-based stains need a degreaser, while organic stains require an enzyme-based cleaner. Rust stains are best treated with oxalic acid.
- Surface Protection: Check if the cleaner offers any benefits such as surface protection or water repellency. These features can help keep your walls looking good over time.
Moreover, there are some extra things to consider when selecting a chemical cleaner. Make sure to pick one specifically formulated for indoor or outdoor use, based on the location of your basement. Also, bear any environmental concerns in mind and go for an eco-friendly option if available.
Using chemical cleaners on concrete walls requires some safety measures for their effectiveness.
- Read and follow the manufacturer’s instructions carefully.
- Do a spot test on an inconspicuous area to make sure there are no adverse reactions or discoloration.
Finally, remember to wear gloves, protective eyewear, and have proper ventilation during application.
By choosing the right chemical cleaner based on pH level and stain type, plus considering additional benefits like surface protection, you can clean your walls properly without any damage. Doing this will result in stunning walls that make your basement look amazing.
If you thought applying chemicals to your face was exciting, wait until you try them on your concrete basement walls!
Applying the chemical cleaner to the walls
Clean concrete basement walls require an essential step – the application of a chemical cleaner. This helps remove tough stains and dirt, leaving fresh and clean walls. Here’s a simple 6-step guide to applying the chemical cleaner:
- Prepare the area: Move furniture and cover the floor with protective materials.
- Dilute the cleaner: Mix water and the correct amount of cleaner as directed with gloves and eye protection.
- Test in an inconspicuous area: Check if it causes any discoloration or damage.
- Apply the solution: Use a sprayer or brush and work in small sections.
- Scrub with a brush: Apply gentle pressure and work in circular motions.
- Rinse thoroughly: Remove all traces of cleaner with a sponge or mop.
Different cleaners might need different techniques or dwell times before rinsing off, so always refer to product instructions.
My friend had a neglected basement with crumbling walls, but he applied a powerful chemical cleaner and followed the above steps. He was astounded to see the transformation – the walls looked almost new! This motivated him to transform the space into a cozy entertainment area for his family and friends. Remember – patience is key when cleaning concrete basement walls, let the cleaner do its work while you relax!
Allowing the cleaner to sit for the recommended amount of time
For cleaning concrete basement walls, it’s vital to let the cleaner sit for the recommended time. This allows it to properly break down dirt, stains, and mold. Here’s a step-by-step guide:
| Step | Instructions |
|---|---|
| 1 | Apply the cleaner with a sponge or brush. Cover all areas evenly. |
| 2 | Don’t immediately scrub – let the cleaner sit for 10-15 minutes (or as directed). |
| 3 | Use this time to get ready with any extra tools. |
| 4 | Check if the cleaner has dried out or been absorbed in porous surfaces. If yes, reapply it. |
| 5 | Start scrubbing from one corner with a scrub brush or sponge. Go in circles until all sections are clean. |
Make sure children and pets don’t access the area during this waiting period, to avoid contact with chemicals.
Throughout history, letting cleaners sit has been proven to work. Ancient Egyptians used vinegar and salt solutions left overnight; medieval recipes instructed people to let soapsuds rest before washing off with water. To get the best results on concrete basement walls, use this method.
Rinsing the walls thoroughly with water
Rinsing concrete basement walls with water is a must for keeping them looking clean and fresh. Here’s a simple 4-step guide to get the job done right:
- Fill a bucket with room temperature water.
- Use a large sponge or mop to wet the walls from top to bottom.
- Wring out the sponge/mop periodically to remove dirt/debris.
- Allow the wall to air dry naturally – no heat sources!
Note: For stubborn stains/mold, additional measures like specialized cleaners or professional help may be required.
To maintain the durability and appearance of your concrete basement walls, follow these maintenance tips and say no to dirty walls – just like you do to embarrassing browser histories!
Post-Cleaning Care and Maintenance
To ensure thorough post-cleaning care and maintenance for clean concrete basement walls, address any excess water or residue, allow complete drying, and inspect for any remaining stains or areas requiring further cleaning. Removing water or residue, allowing drying, and inspecting will help maintain pristine concrete walls in your basement.
Removing any excess water or residue from the walls
- Before you start, gather your tools and materials. You’ll need:
- A dry cloth or sponge
- A bucket of warm water
- Mild detergent/wall cleaner
- Rubber gloves for protection
- Gently wipe the walls with a dry cloth or sponge to remove any dust. This prevents smearing when you clean.
- Dampen the cloth/sponge in warm water, wring out excess moisture, and add some detergent/wall cleaner.
- Work top to bottom in small areas. Apply the cleaning solution and gently scrub any residue/water marks. Be careful not to apply too much pressure.
- Rinse the cloth/sponge in clean water and go over the walls again to remove any soap residue. Allow the walls to air dry.
- To keep walls spotless, inspect ceilings for signs of leaks/moisture buildup. These can cause stubborn stains.
- Remember: a dry wall is a happy wall – just like a happy wife means a happy life. Take care of them both!
Allowing the walls to dry completely
Clean your walls thoroughly, and let them fully dry before any further maintenance or decoration. This is important for the long-term success of these actions.
Here’s a 6-step guide to help with full drying:
- Wipe away moisture: Use a cloth or sponge to get rid of remaining moisture.
- Air it out: Open windows and doors in the room to promote air flow.
- Get the fans going: Place fans around the room to direct air to damp spots.
- Use dehumidifiers: If you have them, turn them on to reduce humidity.
- Don’t touch or lean anything against the walls: Contact can slow down the drying process.
- Monitor moisture levels: Use a meter or sensor to check for any remaining dampness.
Also, consider:
- Up the ventilation: Place box fans in open windows to bring in fresh air and expel damp air.
- Use a heat source: A heater near damp areas can help evaporation by raising the temperature.
By following these steps, you’ll ensure complete drying and prevent issues like mold growth or paint peeling. Give your walls enough time to dry before embarking on tasks.
Inspecting the walls for any remaining stains or areas that need further cleaning
Inspection of walls is a must for proper cleaning. Here’s how to go about it:
- Start off by standing away and taking a look at the walls for any stains or dirt.
- Get close and feel the walls with your hand, to detect sticky spots or rough patches.
- Finally, use a bright light to spot hidden imperfections from various angles.
Be warned! Don’t use nails or press too hard on the walls. It could damage the paint.
Also remember to use natural lighting when inspecting the walls. This helps reveal any dirt or stains which may have been missed.
Finally, a clean basement is a happy basement – and fewer nightmares about stains attacking you in your sleep!
Conclusion
To keep basement walls clean, regular cleaning is a must. This prevents costly repairs and keeps walls in good shape. To avoid dirt and stains, address the root causes. Seal walls with waterproofing products and install vapor barriers for extra protection. Dust walls with soft brushes or vacuum attachments. Stubborn stains? Gently scrub with mild detergent and warm water. Rinse it off afterward. Inspections are essential too. Look for signs of water damage. Taking quick action can prevent further damage.
Remember: Regular cleaning routines save you time and money. Here’s proof: A family neglected their basement for years. Eventually, they found mold growth from a leaky pipe. Costly repairs and health risks occurred. If they had kept up with regular cleaning, this could’ve been avoided.
Frequently Asked Questions
FAQs for How to Clean Concrete Basement Walls:
1. Can I use regular household cleaners to clean concrete walls?
No, regular household cleaners are not recommended for cleaning concrete basement walls. They may not be effective in removing tough stains and can potentially damage the concrete surface. It’s best to use cleaners specifically designed for concrete.
2. What kind of cleaner should I use?
You should use a concrete cleaner that is specifically formulated for cleaning basement walls. These cleaners are designed to effectively remove stains, dirt, and debris from concrete surfaces without causing any damage.
3. How do I prepare the walls before cleaning?
Before cleaning the concrete basement walls, you should remove any loose dirt and debris using a broom or vacuum cleaner. If there are any heavy stains, you may need to pre-treat them with a stain remover before applying the concrete cleaner.
4. Can pressure washing be used to clean concrete basement walls?
Pressure washing can be used to clean concrete basement walls, but it should be done carefully. Use a low-pressure setting and keep the nozzle at a safe distance from the wall to avoid causing any damage. It’s important to follow the manufacturer’s instructions and wear appropriate safety gear.
5. How do I apply the concrete cleaner?
Follow the instructions on the concrete cleaner’s packaging for the specific application method. In general, you may need to dilute the cleaner with water and scrub it onto the walls using a brush or sponge. Allow the cleaner to sit for some time to penetrate and loosen the dirt, and then rinse it off thoroughly with clean water.
6. Are there any safety precautions I should take while cleaning concrete basement walls?
Yes, it’s important to take safety precautions while cleaning concrete basement walls. Wear protective gloves, goggles, and a mask to prevent any contact with the cleaner or dust. Make sure the area is well-ventilated, and keep children and pets away during the cleaning process.
