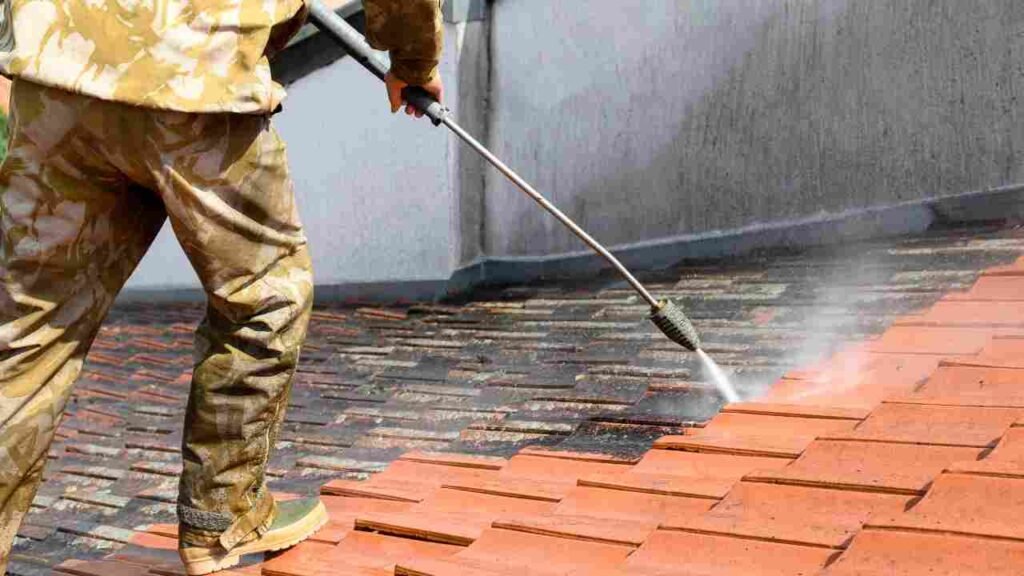
Ceramic briquettes are a great choice for grillers. They offer even heat distribution and also help reduce flare-ups. But, they need to be cleaned regularly to keep them working well. Here’s how to clean ’em up!
- Start by removing the briquettes from the grill. Brush off any loose debris with a stiff wire brush. This prevents yucky flavors from getting into your food.
- Next, wash the briquettes in warm water and mild dish soap. Use a soft cloth or sponge to scrub any tough stains or grease marks. Rinse them off fully.
- You can also soak the briquettes in equal parts water and white vinegar for 30 minutes. Vinegar has acetic acid that helps break down grime and sanitize the surface.
- If you prefer a natural approach, try baking soda. Mix it with water to form a paste. Apply the paste to each briquette and leave it for 15 minutes before rinsing.
Fun fact: Ceramic briquettes were invented in the 1960s by Drayton McLane Jr., founder of The McLane Company. He wanted to produce consistent heat on broilers and reduce flare-ups from fat.
Ceramic Briquettes
To understand ceramic briquettes and their benefits, delve into what they are and explore their advantages. Discover what separates these briquettes and how they can improve your grilling experience. Gain insight into the remarkable properties of ceramic briquettes and learn why they are a popular choice among grilling enthusiasts.
What are Ceramic Briquettes?
Ceramic briquettes are heat-resistant and non-toxic clay blocks used in grills and barbecues. They’re a great replacement for charcoal or lava rocks! These small pieces provide even heat distribution and retain heat longer, meaning better cooking performance.
Here are the key features of ceramic briquettes:
| Features | Benefits |
|---|---|
| Heat retention | Retains heat for consistent cooking |
| Even heat | Distributes heat evenly across the surface |
| Non-toxic | Safe for food contact |
| Durability | Resistant to breakage and wear |
| Easy maintenance | Simple to clean and reuse |
Plus, ceramic briquettes vaporize drippings and give your food a unique smoky taste. High temperatures are no problem either, making them a popular choice among grill fans.
Sarah shared her experience using ceramic briquettes in her gas grill. She said they revolutionized her cooking game by providing consistent heat throughout the grilling process. Result? Perfectly seared steaks and juicy burgers every time!
In conclusion, ceramic briquettes: grilling just got hotter, juicier, and more delicious. No need to worry about your neighbor’s abs!
Benefits of using Ceramic Briquettes
Ceramic briquettes are a great way to enhance your grilling experience! Here are five key advantages of using them:
- Excellent Heat Retention: Ceramic briquettes maintain consistent temperature across the cooking surface – no hot spots here!
- Reduced Flare-Ups: Their porous nature prevents fats and marinades from coming into contact with the flames, minimizing flare-ups.
- Enhanced Flavor: The vaporized drippings from ceramic briquettes add complexity and depth to your food’s flavor.
- Easy Cleaning: These reusable briquettes are simple to clean – just brush off any residue after each use.
- Durable and Long-Lasting: Ceramic briquettes are made from high-quality materials that won’t break or deteriorate easily.
Also, they require minimal maintenance. Preheat your grill with ceramic briquettes for at least 10 minutes before grilling your food – this will ensure even heating. Plus, you won’t need to bribe your neighbors with homemade cookies!
Materials Required
To effectively clean ceramic briquettes, you’ll need a few essential materials. The cleaning solution, soft bristle brush, and a bucket of water are the key components for tackling this task. Each of these items plays a crucial role in ensuring your ceramic briquettes get a thorough and successful cleaning.
Cleaning Solution
Cleaning Solution is crafted with potent ingredients that go deep into dirt and grime. It’s safe for use on different surfaces like countertops, floors, glass, and appliances. Plus, it leaves a fresh and nice smell to create a clean atmosphere.
Important: Handle Cleaning Solution with caution. Don’t let it touch your eyes and skin. Always follow the instructions on the packaging.
An amazing thing happened with Cleaning Solution. A user spilt red wine on their brand new carpet at a housewarming party. They panicked! But, when they used their Cleaning Solution, the stain disappeared in minutes! This saved the carpet and everyone was amazed.
Clearly, Cleaning Solution is great for keeping places clean and tackling stains. Why bother with a soft bristle brush when you can get a group of kittens to do the job?
Soft Bristle Brush
Soft bristle brushes are a must-have for many tasks. Their gentle and delicate bristles make them great for cleaning and grooming without causing damage.
- Cleaning Done Right: The soft bristles make cleaning effective – no scratches on delicate surfaces.
- Hair Care: Great for detangling hair and massaging the scalp – so soothing!
- Versatile: From electronics to dusting off delicate objects – you can do it all.
- Pet Grooming: Perfect for fur that needs extra care – knots and tangles will be gone.
- Artistry: Create beautiful strokes and blend colors effortlessly – a must-have for artists.
Plus, their flexibility helps reach narrow spaces and corners other brushes can’t. Soft bristle brushes have been used since ancient times – they’ve come a long way, and now they’re indispensable!
Bucket of Water
A bucket of water is a magical tool! It’s sturdy material and convenient size make it durable and easy to handle. Plus, its handle enables effortless transportation and its wide opening facilitates filling and pouring water.
What makes it so special? It can be used for cleaning, gardening, and construction projects! To maximize its effectiveness, here are some tips:
- Keep it clean – Regularly clean the bucket to prevent dirt and contaminants.
- Use it efficiently – Strategize how much water you need to minimize wastage.
- Control the temperature – Adjust the temperature based on the task.
- Be aware – Reuse the water before disposing of it.
These suggestions will ensure optimal utilization of your bucket of water. This will help prolong its lifespan and make everyday tasks more efficient, contributing to a sustainable and resource-conscious approach.
Step-by-step Cleaning Process
To clean ceramic briquettes effectively, start by removing the grill grates. Brush off the loose debris and proceed to soak the briquettes. Scrub them gently, ensuring all dirt is removed. Finally, rinse and dry the briquettes before replacing them.
Remove the Grill Grates
Removing the grill grates is a must! To get your grill sparkly clean, follow these steps:
- Turn off the grill and let it cool.
- Use a wire brush or grill scraper to remove food particles.
- Unscrew or detach the grates from the grill frame (check the manual).
- Place the grates in a warm, soapy water-filled sink or basin.
- Use a sponge or brush to scrub any dirt or grease. Pay extra attention to tough spots.
- Rinse the grates and let them air dry before reattaching them.
Remember, regular cleaning of your grill grates not only tastes better, but also increases its longevity. BBQGuys.com states that not cleaning your grill can cause rust and breakdown of its components. So, grab your broom and start sweeping away!
Brush Off Loose Debris
Brushing off loose debris is an important first step in cleaning any surface. Let’s explore the 3-step guide to do it right!
- Assess: Take a look at the area you’re about to clean. Identify any dirt, dust, or small particles that are visibly loose. This will help you choose the right tool and technique.
- Select Tool: Pick a tool for brushing according to the surface material. Use a soft-bristle brush or microfiber cloth for delicate surfaces like glass or polished wood. For sturdier surfaces, opt for a stiff-bristle brush or even a broom.
- Brushing Technique: Sweep or brush gently in one direction, from top to bottom or left to right. Make sure to reach into corners and crevices. Finally, be sure to dispose of the debris properly to avoid recontamination.
Tip: After brushing off the debris, give those briquettes a nice long soak for a sparkling clean grill!
Soak the Briquettes
Soaking briquettes is key to a good clean. It helps get rid of grime and helps them cook better. Here’s how:
- Put them in a big container or bucket.
- Fill it with enough water to cover the briquettes.
- Let them soak for at least 30 minutes – until they’re saturated.
- Add a bit of detergent or soap to help clean them.
- Move them around with your hands or a spoon.
- Drain the water and rinse with fresh water.
It’s important to check the brand’s instructions, as soaking time can vary. Plus, warm water can work better. Taking care of your briquettes will make them last longer and cook better. For extra sparkle, give them a scrub with a brush!
Scrub the Briquettes
Scrubbing briquettes is a must! It helps get rid of dirt and debris. Here’s how:
- Look for any big chunks or tough stains. Use a brush or scraper to remove them.
- Create a solution with warm water and mild detergent. Use a sponge or cloth to scrub the surface of the briquettes.
- Focus on dirty or stained areas. Use small circles and moderate pressure to clean.
- Rinse with clean water to get rid of soap residue. Let the briquettes air dry before using.
For extra cleaning power, try these tips:
- Use an old toothbrush to get to crevices and tight spots.
- Make a paste from baking soda and water for stubborn stains. Let it sit before scrubbing.
- Avoid harsh chemicals or abrasive cleaners. Stick to mild detergents and natural solutions.
By scrubbing and caring for your briquettes, you’ll extend their life and maintain their looks. Get ’em good and clean – for your next beach bonfire or impromptu barbecue!
Rinse and Dry the Briquettes
It’s essential to rinse and dry your briquettes to ensure they’re free from any unwanted debris or residue. Follow these 5 steps for a proper clean:
- Place the briquettes in a large container.
- Submerge the briquettes with lukewarm water.
- Agitate the briquettes with your hands to remove dirt and grime.
- Discard water and impurities.
- Allow the briquettes to air dry.
Be aware of soap or detergent that may be left on the briquettes, as this could interfere with their performance. Also, watch out for water spots or streaks that may form during drying.
For a thorough clean, try rinsing and drying your briquettes in smaller batches. This way, each briquette gets individual attention. But remember, cleaning is one thing, but don’t do anything that’ll land you in trouble!
Final Tips and Recommendations
For a thorough clean, pay attention to detail and use the right techniques. Here’s the final scoop:
- Take the briquettes out of the grill carefully. Handle them with gentleness to prevent damage.
- Use a wire brush or scraper to remove food particles and debris. Scrub thoroughly for a clean base.
- Mix warm water and mild dish soap. Sponge or cloth it up and softly scrub each briquette. This’ll remove stubborn stains and grime.
- Rinse the briquettes with clean water after washing them with soap. Make sure no residue is left before putting them back into the grill.
To be extra-super clean, you can use a specialized ceramic cleaner. It won’t damage the briquettes and can guarantee excellent results.
A friend of mine, who had let his grill go for months, was astonished at the difference after cleaning the briquettes. His food tasted so much better! This proves the importance of regular maintenance.
Follow these tips and your ceramic briquettes will stay in top condition. Happy grilling!
Conclusion
Ceramic briquettes get grease, food particles, and other debris over time. To keep them efficient and make them last longer, it’s important to clean them often. Cleaning briquettes boosts their cooking performance and makes sure you have a safe and healthy grilling experience.
This is an easy process that needs some tools and materials. Firstly, take out the briquettes from the grill and put them in a bucket or sink with warm, soapy water. Then, use a brush or sponge to delicately scrub each briquette and take off built-up residue. Lastly, rinse well with clean water.
If there are obstinate stains or grease, you may need to use a degreaser or specific cleaning solution for ceramic surfaces. Read the instructions on the packaging carefully and apply the cleaner on the affected areas. Let it sit for a few minutes then scrub the dirt off with a brush or sponge. Rinse once more with clean water.
When done, let the ceramic briquettes dry completely before putting them back in the grill. This stops any moisture from being trapped inside and causing mold or mildew growth.
Regularly cleaning ceramic briquettes is essential for great grilling performance and avoiding flare-ups from too much grease. By including this maintenance into your grilling routine, you can enjoy great-tasting meals and a hygienic cooking atmosphere.
Don’t miss out on the advantages of clean briquettes! Make sure your grilling experience is perfect by cleaning these important parts of the grill regularly. You just have to spend a bit of time and you can make your cooking results better and your grill last longer. So get your cleaning supplies and start renewing your ceramic briquettes today!
Frequently Asked Questions
1. How often should I clean ceramic briquettes in my grill?
It is recommended to clean ceramic briquettes in your grill at least once every three months. However, if you use your grill frequently, you may need to clean them more often.
2. What is the best method to clean ceramic briquettes?
The best method to clean ceramic briquettes is to remove them from the grill and brush off any debris, such as ash or grease, using a wire brush. You can also soak them in a mixture of warm water and mild dish soap, scrub with a brush, and rinse thoroughly before putting them back in the grill.
3. Can I clean ceramic briquettes in a dishwasher?
No, it is not recommended to clean ceramic briquettes in a dishwasher. The high heat and strong detergents used in dishwashers can damage the briquettes and reduce their effectiveness. Stick to manual cleaning methods for ceramic briquettes.
4. Are there any special cleaning products for ceramic briquettes?
There are no specific cleaning products designed solely for ceramic briquettes. Regular dish soap or mild cleaners can be used to clean them effectively. Avoid using harsh chemicals or abrasive cleaners as they may damage the briquettes.
5. How should I store ceramic briquettes when not in use?
When not in use, ceramic briquettes should be stored in a dry place to prevent moisture buildup. It is best to keep them in a sealed container or bag to protect them from dust and dirt. If possible, store them indoors to prolong their lifespan.
6. Can I reuse ceramic briquettes after cleaning?
Yes, you can reuse ceramic briquettes after cleaning them. However, over time, the briquettes may degrade and lose their effectiveness. If you notice any cracked or broken briquettes, it is recommended to replace them for optimal grilling results.
