 Maintaining a garden hose is key. A sticky hose can stop water flow and be a dirt and debris spot. Here, we’ll discover how to clean a sticky garden hose and make it work great. Let’s explore the secrets of gardening!
Cleaning your garden hose is important for its operation and life. Over time, hoses can collect residue from minerals, dirt, and other substances. This buildup can make the hose sticky, difficult to handle, and easy to tangle. Regular cleaning can prevent these issues.
Start by disconnecting the garden hose from the water source. Undo any kinks or twists. Scrub the exterior of the hose with a mild soap and warm water combo. Start at one end and move to the other. Rinse the soap off until there are no traces.
For tougher stickiness or residue, use vinegar. Mix equal parts vinegar and warm water in a basin big enough to fit the whole hose. Let the hose soak in the solution for an hour. Rinse with clean water.
To minimize stickiness in your garden hose, drain excess water after each use by unrolling it on flat ground. Store it in a dry and shaded area when not in use. This will keep it clean and prevent damage.
Reasons for a Sticky Garden Hose
Sticky garden hoses can be caused by several factors. Firstly, prolonged exposure to outdoor elements such as sunlight and extreme temperatures can degrade the hose’s outer coating, leading to stickiness. Secondly, the accumulation of dirt, grime, and other contaminants over time can also contribute to a sticky hose surface. Lastly, improper storage, such as leaving the hose coiled up while damp, can promote mold and mildew growth, resulting in stickiness. These factors can all diminish the functionality and lifespan of the hose, making it essential to address the stickiness promptly.
Stickiness in garden hoses is not just caused by the accumulation of dirt and grime, it’s nature’s way of giving you an extra workout while untangling.
Common Causes of Stickiness
Sticky garden hoses? Yup, this can happen. The cause? A few things:
- Hot and cold temperatures can damage the hose material, giving it a sticky texture.
- Neglecting to clean the hose after use can lead to residue buildup.
- Harsh chemicals? That’s another no-no. To prevent this, take proper care of your hose.
Now for the unique stuff. Insects love sugary residue left behind on the hose. Also, certain types of natural rubber hoses can become sticky due to reactions with garden soil. Plus, if not properly maintained, algae growth can occur inside the hose, making it sticky.
Rachel’s story sheds light on this matter. Her garden hose was sticky after every use. She got professional advice and learned that she’d been leaving her hose in direct sunlight for too long. With the right info on storing and caring for the hose, Rachel was back to having a non-sticky garden experience.
Dirt and Grime
Dirt and grime can cause sticky garden hoses. They settle in the crevices and create friction, reducing flexibility. Greasy substances and other residues cling to the hose surface, making it tacky. Dirt and grime can also accumulate inside the hose, blocking water flow.
External elements like dust, pollen, and mud can settle on the surface and form an adhesive layer. Regular exposure to sunlight leads to oxidation, hardening the residue and making it stickier. If a hose is left on damp ground, mold or mildew may develop, causing stickiness.
To prevent stickiness, clean the hose regularly, inside and out. Modern hoses are made of synthetic materials like PVC and reinforced rubber, making them more resistant to stickiness. This improves the user experience and makes gardening easier.
Mold and Mildew
Mold and mildew can create a sticky mess on your garden hose. These fungi love damp places, like hoses that aren’t drained and stored properly.
The slimy residue makes the hose hard to handle and maneuver. Plus, it’s a health risk for people with respiratory issues.
We’ll look at the details:
| Findings | Solution |
|---|---|
| Mold spots | Wipe with vinegar |
| Mildew odor | Soak in bleach |
It’s important to deal with this quickly. Here are some tips:
- Inspect the hose for mold or mildew.
- Drain water after each use, remove kinks and loops.
- Store in a dry and well-ventilated place.
These steps will help keep your garden hose in good condition for years.
Residue from Chemicals or Fertilizers
Chemicals or fertilizers leaving residue can make garden hoses sticky. This residue accumulates over time, making the hose hard to use and less flexible. See the table below for more info:
| Residue | Effects | Solutions |
|---|---|---|
| Chemicals | Sticky film | Rinse after use. Use organic alternatives. |
| Fertilizers | Sticky substances | Clean with soap or vinegar solution. Avoid too much fertilizer. |
Also, some chemical-based products and fertilizers may react with the hose material and become sticky. So, read product labels carefully and pick gardening products that don’t cause residue or damage the hose.
To prevent stickiness, here are some tips:
- Rinse the hose properly.
- Use organic gardening products.
- Clean the hose regularly.
By following these suggestions, you can keep your garden hose smooth and functional by avoiding sticky residues. Always think about the health of your plants and the durability of your hose when choosing gardening products.
Preparing for Cleaning
Preparing for a Clean Hosing
To ensure a successful cleaning process for a sticky garden hose, follow these simple steps:
- Remove any attachments: Detach sprayers, nozzles, or other accessories from the hose.
- Straighten the hose: Lay the hose out in a straight line to make it easier to clean and inspect.
- Inspect for damage: Check the hose for any cracks, leaks, or twists that may need repair before cleaning.
- Secure the ends: Attach one end of the hose to a spigot or faucet and fasten the other end to a sturdy object or hold it tightly to prevent it from whipping around during cleaning.
To ensure the thorough cleaning of your garden hose, it’s important to pay attention to these details. Avoid rushing through this step, as it can affect the overall cleanliness of the hose.
Pro Tip: Before starting the cleaning process, ensure that the water source is turned off to prevent any accidental spills or wastage.
Cleaning a sticky garden hose is like untangling your love life – it’s messy, frustrating, and requires a lot of patience, but in the end, you’ll be happily flowing with smooth water and manageable relationships.
Gathering the Necessary Supplies
Gathering the supplies is key for a successful cleaning process. Here are 6 steps:
- Make a list of cleaning supplies you need. This will help you stay on track and have everything ready.
- Get cleaning solutions for different surfaces. Different surfaces need different solutions, so be sure to have a range. E.g. glass cleaner, tile cleaner and disinfectant spray.
- Don’t forget about cleaning tools! Gather items like microfiber cloths, scrub brushes, sponges and rubber gloves. Having the right tools will make it easier.
- Consider special supplies for specific tasks or areas. E.g. if you have hardwood floors, you may need a specialized mop or floor cleaner.
- Take stock of disposable items, like trash bags or paper towels. Have extras so you don’t run out.
- Don’t forget safety equipment like goggles or face masks if you’re using strong chemicals or in a dusty environment.
Also think about personal preferences and any unique needs in your home when gathering supplies.
Fun fact: According to the American Cleaning Institute (ACI), having an organized supply closet can increase efficiency and reduce cleaning time.
Bucket of Warm Soapy Water
A bucket of warm soapy water is the basis for effective cleaning. It helps break down dirt and grime. Here are 6 points of using it:
- Fill a bucket with warm water.
- Add a small amount of soap or detergent.
- Choose a suitable soap based on the surface.
- Dip your cleaning cloth in the soapy water.
- Scrub the surface in circular motions with some pressure.
- Rinse your cloth or sponge in clean water periodically.
Customize the solution for special tasks. Add vinegar for enhanced stain-removing. Or use warm lavender-scented water for a refreshing aroma. Don’t wait any longer, grab a bucket of warm soapy water and clean your home. Enjoy the satisfaction of sparkling cleanliness with this powerful method.
Soft Bristle Brush or Cloth
Soft Bristle Brush or Cloth:
Having a soft bristle brush or cloth is essential for effective cleaning. These tools provide gentle yet efficient cleaning, avoiding damage to surfaces.
- 1. A soft bristle brush can sweep away particles without scratching or marking surfaces.
- 2. A soft cloth is great for wiping down delicate electronics or decorations.
- 3. With the right cleaning solutions, a soft bristle brush or cloth can tackle tough stains and grime. These tools protect surfaces while providing thorough cleaning.
- 4. Using a soft bristle brush or cloth also prevents cross-contamination. Designate specific tools for different areas to avoid spreading germs.
When using a soft bristle brush or cloth, it is important to use the proper technique and care. Gently apply pressure while cleaning to avoid any damage. Sanitize brushes and cloths regularly to prevent bacteria.
Soft bristle brushes and cloths are invaluable tools for achieving a cleaner and healthier environment without causing harm. They are versatile and effective for maintaining various surfaces in your home.
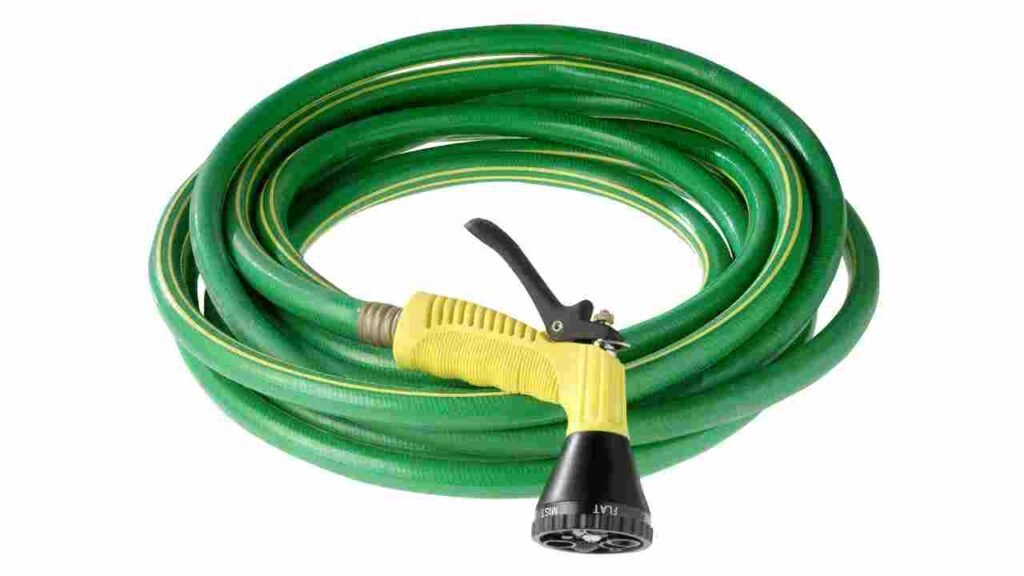
Hose Nozzle with Adjustable Settings
Having the right tools is key for cleaning prep. A hose nozzle with adjustable settings can make a huge difference. It brings:
- Versatility: Customise water flow. A gentle mist or a powerful jet? This nozzle’s got it!
- Easy to Use: Ergonomic handle & user-friendly controls. Twist or slide to set the water flow.
- Water Conservation: Control water flow. Minimise wastage & conserve water.
- Cleaning Power: For tough stains & dirt. Wide spray pattern or focused stream? Your choice.
- Durability: Made of strong materials. Withstands frequent use & all weather conditions.
- Multiple Applications: From gardening to car washing. This tool adapts to almost any task.
Plus, some hose nozzles come with soap dispensers & multiple spray patterns.
My own story with this nozzle: I was trying to clean my deck after a BBQ. My regular sprayer wasn’t working. I switched the adjustable nozzle to the highest pressure. The grime washed away – revealing a clean deck! From then on, I knew my adjustable hose nozzle could tackle anything.
Cleaning Methods
Cleaning Methods:
- Use Vinegar Solution: Mix equal parts of vinegar and water in a bucket. Submerge the sticky garden hose in the solution for 30 minutes to dissolve dirt and grime.
- Use Baking Soda Paste: Make a paste by combining baking soda and water. Apply the paste to the sticky areas of the garden hose and scrub gently with a brush to remove the stickiness.
- Use Dish Soap and Warm Water: Fill a bucket with warm water and add a few drops of dish soap. Soak the garden hose in the soapy water and use a cloth or sponge to wipe away the stickiness.
To ensure a thorough cleaning, gently wipe down the entire length of the garden hose, paying special attention to any particularly sticky spots. Rinse the hose with clean water to remove any residue. By using these cleaning methods, you can restore your garden hose to its original condition.
To prevent stickiness from recurring, it is recommended to properly store the garden hose after use, making sure it is fully drained and coiled neatly. Avoid leaving the hose in direct sunlight, as UV exposure can cause degradation and stickiness over time. Regular cleaning and maintenance will prolong the lifespan of your garden hose and ensure optimal performance.
Get ready to give your garden hose some tough love – none of that soft caressing with a feather-duster nonsense here!
Method 1: Manual Scrubbing
Manual scrubbing is a great way to clean surfaces! Here’s an easy guide:
- Get the cleaning solution ready: Put a suitable cleaning agent in a bucket with water, and mix it to the manufacturer’s instructions.
- Choose the right tools: Pick a brush or sponge that fits the surface. Soft bristles work for delicate stuff, while harder ones are better for tough surfaces.
- Do the scrubbing: Dip the brush/sponge into the solution and scrub back and forth in small circles. Be sure to get the edges and corners.
- Rinse and dry: Rinse the surface with clean water to get rid of residue. Then use cloths or towels to completely dry it, so there’s no watermarks or streaks.
Extra tips:
- Don’t use abrasive brushes on delicate surfaces.
- Wear protective gloves when using strong cleaning agents.
- Test a small area before scrubbing.
Pro Tip: Sanitize your cleaning tools by soaking them in disinfectant after each use.
Step 1: Disconnect the Hose from the Water Source
To ensure a hassle-free hose disconnection, it’s important to follow these steps:
- Start by turning off the water supply with the shut-off valve.
- Then, press the trigger or nozzle to release any pressure.
- Carefully unscrew the hose from the source, using a wrench if needed.
- Be mindful of any twists and kinks, and straighten them out.
- Inspect both ends for debris or blockages, and clear them out.
- Remember, proper maintenance will prolong the hose’s lifespan.
Pro Tip: Drain out any remaining water after disconnecting to prevent freezing.
Step 2: Scrub the Hose with the Soapy Water and Brush
Scrubbing the hose with warm soapy water and a brush is a must. Here’s how to do it properly:
- Make a bucket of soapy water, using a mild detergent or dish soap.
- Dip the brush into the water then start scrubbing the hose. Do this from one end to the other, covering all areas.
- Focus on stubborn stains and dirt. Apply more pressure and scrub vigorously to get rid of them.
- Rinse the hose with clean water to remove soap residue. This is essential to avoid any harmful chemicals.
Once done, the hose will be ready for use. Cleaning it regularly will increase its lifespan and improve performance.
Different hoses may require special cleaning methods. Read the manufacturer’s guidelines for extra instructions and precautions.
Let me tell you a hose cleaning story.
A friend of mine hadn’t cleaned her garden hose for years. It had lots of grime and algae. She thought about replacing it.
But then she found a cleaning guide like this one. She gave it a go. With soapy water and a brush, she scrubbed the layers of dirt away. She was shocked! Not only was it clean but in great condition too!
From then on, she cleans her garden hose regularly. This keeps it in good shape and working well.
Step 3: Rinse the Hose Thoroughly
Rinsing your hose is essential for cleaning it properly. Make sure to follow these 4 steps:
- Disconnect the hose from its water source.
- Elevate one end of the hose and shake it gently to remove any remaining water.
- Run clean water through the entire length of the hose, focusing on the dirtier areas.
- Keep rinsing until the water is clear and free from particles.
Don’t forget to avoid harsh chemicals or cleaners while rinsing. Also, inspect the hose for any damage or wear afterwards.
Here’s a cautionary tale: a friend didn’t rinse her hose properly and ended up with mold. She had to replace the hose because of an unpleasant smell. So, remember to rinse your hose thoroughly. It might save you from costly headaches in the future!
Method 2: Using a Vinegar Solution
Vinegar – a natural and versatile ingredient – is a great cleaning agent! Here’s how to use it:
- Make the solution:
- Fill a spray bottle with equal parts vinegar and water.
- Shake it up!
- Apply:
- Spray the solution on the surface you want to clean.
- Let it sit for a few minutes.
- Wipe and rinse:
- Use a clean cloth or sponge to wipe away the dirt or stains.
- Rinse with water to remove any remaining vinegar.
Vinegar can be used to clean countertops, windows, mirrors, and floors. Its acidic properties dissolve grease, grime, and mineral deposits without leaving chemical residues. Plus, it deodorizes! Its odor-fighting properties make it great for beating unpleasant smells.
A true story: I had a stubborn stain on my favorite shirt. Commercial stain removers didn’t work. Someone suggested using vinegar. I soaked the stained area in a vinegar/water mix overnight. Miraculously, the stain vanished when I washed the shirt the next morning. From that day, I’ve been a believer in vinegar’s magical cleaning powers!
Step 1: Create a Vinegar Solution
Creating a vinegar solution is your first step for cleaning! It’s efficient and friendly to the environment, so it’s a great choice. Here’s how to make it:
- Gather white vinegar and water.
- Pour equal amounts of both into a container.
- Stir it up well.
- Put the mixture in a spray bottle.
- Mark the bottle so you don’t confuse it.
- Now your vinegar solution is ready to use!
Vinegar has special powers! It’s a natural disinfectant, killing germs on surfaces. Plus, it’s safe for most materials, like glass, metal, and fabric.
Pro Tip: For tough stains or dirt, increase the vinegar concentration with more vinegar than water. But be careful – this stronger mixture may damage delicate surfaces.
Using vinegar as a cleaner is good for your home and the environment. So get a bottle of white vinegar and make your own all-purpose cleaner today!
Step 2: Soak the Hose in the Vinegar Solution
For spotless hose cleaning, here is what to do:
- Mix equal parts vinegar and water in a bucket.
- Detach the hose and submerge it in the solution.
- Let it soak for 30 mins – use this time to clean other equipment.
- Remove hose and rinse with clean water.
- Hang to dry and reattach.
Remember, using vinegar sanitizes your hose and eliminates odors. Scrub gently with a soft brush for better results. Cleaning your hose can be easy – soaking it in vinegar gets rid of dirt, grime, and bacteria without harsh chemicals. Follow the steps for a clean experience and get a fresh hose ready for use.
Step 3: Scrub and Rinse the Hose
The third step in the cleaning process is scrubbing and rinsing the hose. This is vital for hygiene and avoiding contaminants. Here’s how to do it:
- Disconnect the hose from the water source.
- Scrub the hose with a brush or sponge. Check for dirt.
- Rinse off the dirt with clean water. Get rid of soap residue.
- Look at both ends for signs of damage or blockage. Use a brush or pipe cleaner to clear obstructions.
- Rinse the inside of the hose with water for several minutes.
- Hang the hose in a ventilated area to dry before reconnecting to the water source.
Be careful not to use harsh chemicals or abrasives that could damage the hose. Cleaning hoses regularly is essential to keep them working well and avoid clogging, low water flow, and contamination.
My friend learned this lesson the hard way. They didn’t clean their garden hose after using it for months. Bacteria built up inside the hose and contaminated the water they sprayed on their plants. Cleaning hoses regularly is key to avoiding such problems.
Additional Tips for Maintenance
Additional Tips for Maintaining the Garden Hose:
- Regularly inspect the hose for any signs of wear or damage, such as leaks or cracks. Use a visual inspection to identify any areas that may need repair or replacement.
- After each use, drain the hose completely to prevent water from accumulating and causing mold or mildew. This can be done by elevating one end of the hose and allowing the water to flow out.
- Store the hose properly by coiling it in a neat and organized manner. Avoid kinks or twists in the hose while storing as it can damage the internal structure.
- Protect the hose from extreme weather conditions, such as high heat or freezing temperatures, by storing it in a shed or garage when not in use.
In addition to these maintenance tips, it is important to avoid using the hose for purposes other than watering plants or washing outdoor surfaces. Using the hose for activities such as filling up a pool or cleaning a muddy car can put excessive strain on the hose and lead to damage.
True History:
Garden hoses have been in use for centuries to provide a convenient way to transport water for gardening and other outdoor activities. Originally made from leather or rubber, modern garden hoses are typically constructed with durable materials like PVC or reinforced rubber for increased longevity. Over time, people have learned the importance of proper maintenance to ensure the hose remains in good condition and functions efficiently.
Don’t just coil it up and leave it be; treat your garden hose like a bad breakup and wrap it tightly before shoving it into a dark corner.
Storing the Hose Properly
Storing the hose correctly is essential for it to last. Here’s what you can do to keep your hose in top shape:
- Firstly, be sure to empty the hose of all water prior to storing. This will stop any trapped water from freezing and damaging the hose.
- Keep it away from the sun and bad weather. Put it away in a cool and dry place so that it won’t degrade due to UV rays or other elements.
- Invest in a hose reel or hanger. This’ll stop it getting tangled up and keep it in great condition.
Here are some extra tips to guard your hose:
- Clean it before putting it away. This will stop clogs and help it work properly next time.
- Don’t drag it across rough surfaces. Gently coil it up and carry it instead to reduce damage.
- Keep an eye out for leaks or cracks. Repair or replace these quickly to stop it deteriorating further.
By following these steps, you can make sure your hose is working well for a long time. Proper storage will save you money and let you use it without trouble.
Regular Inspections and Maintenance
Regular inspections and maintenance are a must for any system or equipment to function properly and last longer. Neglecting these tasks can bring expensive repairs, downtime, and even security risks. Here’s what to consider:
- Watch out for signs of wear and tear.
- Lubricate and clean moving parts.
- Tighten any loose connections.
- Test the system for any issues.
- Keep records of inspections and repairs.
- Follow a maintenance schedule rigorously.
Also, check for any updates or upgrades. Technology advances quickly and staying up-to-date will boost efficiency and performance.
Don’t delay regular inspections and maintenance. Procrastination can lead to unexpected breakdowns or failures that could have been avoided. Being proactive also extends the lifespan of your equipment and helps you avoid sudden expenses.
Act now! Secure your peace of mind and let regular inspections and maintenance ensure your equipment runs smoothly.
Conclusion
To wrap up the cleaning of your sticky garden hose, it’s important to make sure all steps were followed. This ensures the hose is fully functional and long-lasting.
Earlier, we discussed cleaning the hose. Don’t forget to give it a final rinse with clean water to get rid of soap residue and debris.
For further cleanliness, consider periodic maintenance routines. This includes inspecting for cracks or leaks, storing in a cool, dry place, and proper handling and coiling. Doing these things will help the hose last longer and avoid future problems.
Let’s appreciate the history of the garden hose. It goes back to the Egyptians and Assyrians who used irrigation systems for farming. Over time, improved materials and designs came about, resulting in the rubber hoses we use today.
Frequently Asked Questions
FAQs for How to Clean a Sticky Garden Hose:
1. Why is my garden hose sticky?
There could be various reasons for a sticky garden hose, such as dirt, debris, or residue from plant leaves or sap. Additionally, exposure to the sun can cause the hose material to deteriorate, resulting in stickiness.
2. What materials do I need to clean a sticky garden hose?
You will need warm water, a bucket, mild detergent or dish soap, a soft brush or sponge, and a towel for drying.
3. How do I clean a sticky garden hose?
First, detach the hose from the water source. Fill a bucket with warm water and add a small amount of mild detergent or dish soap. Submerge the hose in the bucket and let it soak for a few minutes. Then, use a soft brush or sponge to scrub away the stickiness. Rinse the hose thoroughly with clean water and dry it using a towel.
4. Can I use bleach to clean a sticky garden hose?
No, it is not recommended to use bleach on a garden hose as it may damage the hose material, leading to cracks or leaks.
5. How often should I clean my garden hose?
It is recommended to clean your garden hose at least once a year or more frequently if you notice any stickiness, dirt, or debris. Regular cleaning helps maintain the hose’s durability and extends its lifespan.
6. Are there any additional tips for keeping a garden hose clean?
Avoid leaving the hose exposed to direct sunlight for prolonged periods as it can cause stickiness. After each use, make sure to remove any remaining water from the hose to prevent mold or mildew growth. Storing the hose properly, such as coiling it neatly and protecting it from extreme temperatures, can also help maintain its cleanliness.
