Are you tired of staring at grimy basement walls that make your entire space feel drab? If so, it’s time to roll up your sleeves and get down to business. Cleaning basement walls may not be the most glamorous task, but it’s essential to transform your dingy basement into a fresh and inviting space.
By following a few simple steps and armed with the right cleaning techniques, you can bid farewell to dirt, grime, and musty odors. Get ready to discover the secrets of achieving spotless walls that will breathe new life into your basement!
Preparing for a Deep Clean:
Before cleaning your basement walls, it’s crucial to prepare yourself and the area for a deep clean. This preparation will ensure you have everything you need and create a safe environment to work in. Here’s what you should do:
Assess the condition:
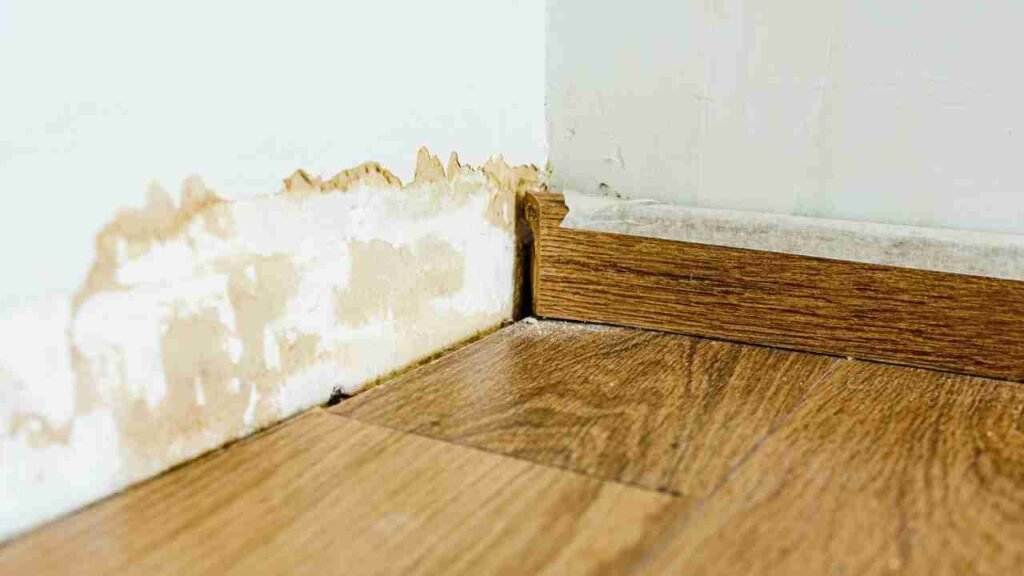
Look closely at your basement walls to determine the cleaning required. Note any mold, mildew, or water damage that needs attention. This assessment will help you understand the challenges you’ll face during cleaning.
Gather the necessary supplies:
Create a checklist of cleaning essentials. This may include protective gear such as gloves, goggles, and a dust mask to shield yourself from potential allergens or harmful chemicals. Additionally, gather cleaning agents like vinegar, bleach, mild detergent, scrub brushes, and a sturdy ladder.
Precautions and Preparations:
When cleaning basement walls, taking proper precautions and making necessary preparations is key to ensuring a safe and efficient process. Before you begin, here are some important precautions and preparations to keep in mind:
1. Protect yourself:
Cleaning basement walls can expose you to potential hazards, including dust, mold spores, and cleaning chemicals. Wear gloves, goggles, and a dust mask to shield yourself from these substances and minimize the risk of respiratory or skin irritation.
2. Adequate ventilation:
Basements often have limited airflow, so it’s crucial to ensure proper ventilation during cleaning. Open windows, use fans or consider using a portable ventilation system to improve air circulation. This will help dissipate any fumes from cleaning agents and reduce the chances of feeling lightheaded or overwhelmed.
3. Clear the area:
Before cleaning, remove any furniture, storage items, or obstacles that could hinder your access to the walls. Clearing the area gives you a clean and unobstructed workspace, making the cleaning process more manageable.
4. Floor protection:
Lay down protective sheets or drop cloths to safeguard the floor from cleaning solutions, debris, and potential spills. This will help prevent any damage or staining to the basement floor and simplify the cleanup process.
5. Read and follow product instructions:
If you’re using specific cleaning agents or solutions, carefully read the instructions and follow them accordingly. Some cleaners may require dilution or specific application techniques, so adhere to the guidelines for optimal results and safety.
Tackling Stubborn Stains:
When it comes to cleaning basement walls, tackling stubborn stains requires a bit of extra effort and attention. Whether you’re dealing with mold, mildew, or other persistent marks, here are some effective techniques to help you conquer those stubborn stains:
1. Assess the stain:
Before diving into the cleaning process, evaluate the nature of the stain. Is it mold, mildew, or a different type of stubborn mark? Understanding the stain’s composition will guide you in selecting the most suitable cleaning method.
2. Mold and mildew:
To combat mold and mildew, create a cleaning solution by mixing equal parts water, vinegar, or bleach. Apply the solution directly to the affected areas and let it sit for a few minutes to penetrate the surface. Then, using a brush or sponge, gently scrub the stain in circular motions. Rinse the area thoroughly and repeat if necessary. Remember to wear gloves and ensure proper ventilation when working with bleach.
3. Grease and grime:
A mild detergent diluted with water can work wonders for oily or greasy stains. Apply the soapy solution to the stain and let it sit for a few minutes. Then, vigorously scrub the area using a scrub brush or sponge to break down the grease. Rinse the wall thoroughly with clean water to remove any residue.
4. Mineral deposits:
If you notice mineral deposits or efflorescence on your basement walls, tackle them with water and white vinegar. Apply the solution to the affected areas and let it sit for a few minutes. Then, scrub the stains using a brush or sponge. Rinse the wall thoroughly with water to remove any remaining residue.
5. Stubborn marks:
You may need to employ stronger techniques for particularly stubborn stains that resist conventional cleaning methods. Try using a commercial cleaning product specifically designed for your type of stain. Follow the instructions provided by the manufacturer and exercise caution when handling these products.
Deodorizing Your Basement:
After thoroughly cleaning your basement walls, the next step is to banish any lingering musty odors and create a fresh and inviting atmosphere. Here are some effective tips for deodorizing your basement:
- Identify the source: To eliminate odors effectively, it’s important to identify and address their root causes. Check for any sources of dampness, such as water leaks or excessive humidity. Look for stagnant water, decaying materials, or mold growth. By targeting the source of the odor, you can prevent it from recurring in the future.
- Improve ventilation: Proper airflow is crucial for combating musty odors in basements. Open windows and doors to allow fresh air to circulate. Consider using fans or installing a ventilation system to enhance air movement. This will help remove stagnant air and reduce moisture levels, effectively reducing odors.
- Use natural deodorizers: Natural deodorizing agents can effectively neutralize unpleasant smells. Place bowls of baking soda in strategic locations around the basement. Baking soda absorbs odors and leaves the air feeling fresher. You can also try using activated charcoal or coffee grounds, which absorb and neutralize odors similarly.
- Deep clean surfaces: Odors can cling to surfaces in your basement. Give your basement walls, floors, and other surfaces a thorough cleaning using appropriate cleaning agents. Pay special attention to areas with accumulated dirt, dust, or spills. By eliminating surface contaminants, you’ll help eliminate odors as well.
- Consider air purifiers: If your basement continues to have persistent odors, consider investing in an air purifier. Look for one with a HEPA filter to trap and remove airborne particles, including odor-causing molecules, effectively. An air purifier can significantly improve the overall air quality in your basement.
- Eliminate moisture: Excess moisture is a common cause of musty odors in basements. Reduce moisture levels by using dehumidifiers or addressing any leaks or water issues. Keep the basement well-ventilated, and consider using moisture-absorbing products, such as silica gel packets, to control humidity.
Adding a Protective Layer:
Once you have cleaned and deodorized your basement walls, adding a protective layer is a wise step to ensure their longevity and maintain their fresh appearance. Here’s how you can add a protective layer to your basement walls:
1. Allow the walls to dry completely:
Before applying any protective coating, thoroughly dry the walls. This ensures proper adhesion and prevents moisture from getting trapped, possibly leading to future issues. This may take a few days, depending on the climate and humidity levels.
2. Choose the right product:
There are several options for protective coatings, so select one that suits your specific needs. Consider factors such as the type of wall surface (concrete, drywall, etc.) and the desired protection level. Common choices include waterproof sealants, concrete sealers, or paint specifically formulated for basements.
3. Prepare the surface:
Proper surface preparation is crucial for a successful application. Start by cleaning any remaining dust, dirt, or debris from the walls. Fill in cracks or holes with an appropriate patching compound and allow it to dry. Smooth out rough surfaces by sanding or using a wall primer if necessary.
4. Apply the protective coating:
Follow the manufacturer’s instructions carefully for your chosen protective product. Using a brush or roller, apply the coating to the walls, working from top to bottom. Ensure even coverage and pay special attention to corners and edges. If applying multiple coats, allow sufficient drying time between each layer.
5. Consider additional features:
You can enhance the protective layer further depending on your needs and preferences. For example, you may opt for a waterproofing membrane or an antimicrobial additive in the coating to prevent water infiltration and inhibit mold or mildew growth.
6. Regular maintenance:
To ensure the longevity of the protective layer, follow any maintenance recommendations provided by the product manufacturer. Regularly inspect your basement walls for any signs of wear or damage. Address any issues promptly to prevent moisture seepage or the deterioration of the protective coating.
Conclusion:
In conclusion, following the steps outlined in this guide can transform your basement walls from dingy and neglected to clean and to invite. Preparing for a deep clean, taking precautions, and gathering the necessary supplies are essential for a successful cleaning process. Tackling stubborn stains, deodorizing the space, and adding a protective layer ensure long-lasting results and a fresh-smelling basement.
Remember, the key is to address the root causes of odors, maintain proper ventilation, and regularly maintain your basement walls. With a little effort and attention, you can create a basement space that is aesthetically pleasing and a healthy and enjoyable part of your home.
