Are you tired of breathing in stale, dusty air at home? Well, my friend, I have just the solution for you! Today, we’re diving into the world of air purifiers and specifically tackling one crucial aspect: how to clean the filter on your Honeywell air purifier. I know what you might think – cleaning filters can be a hassle.
But fear not because I’m here to guide you through a simple and effective process that will work your air purifier like a charm in no time. So, grab your cleaning supplies, and let’s start on the path to fresher, cleaner air in your humble abode!
Gather Your Cleaning Tools:
Before cleaning your Honeywell air purifier filter, it’s important to gather the necessary cleaning tools. Trust me, having everything at hand will make the process a breeze. Here’s a handy checklist of items you’ll need:
- Vacuum cleaner: Opt for a vacuum with a brush attachment to effectively remove loose debris from the filter.
- Soft brush: Look for a gentle brush, like a clean paintbrush or a soft-bristled toothbrush, to dislodge stubborn particles from the filter.
- Mild detergent: Choose a mild, non-abrasive detergent that won’t damage the filter during cleaning.
- Clean, lint-free cloth: Grab a soft cloth, preferably lint-free, to wipe down the filter and ensure it’s free from any residue.
- Optional tools: While not necessary, you may find these additional tools helpful: a compressed air canister for blowing away debris, a gentle spray bottle for rinsing, or a hairdryer on a cool setting for speeding up the drying process.
Removing the Filter:
Now that we have our cleaning tools lined up, it’s time to dive into the first step of the process: removing the filter from your Honeywell air purifier. Don’t worry; it’s easier than you might think. Just follow these simple steps:
- Locate the air purifier: Identify the unit and ensure it’s turned off and unplugged for safety.
- Find the filter compartment: Depending on the model of your Honeywell air purifier, the filter compartment may be located at the front, back, or side. Refer to the manufacturer’s guide if you need clarification.
- Open the compartment: Use the designated latch, button, or sliding mechanism carefully. Take your time to avoid any accidental damage.
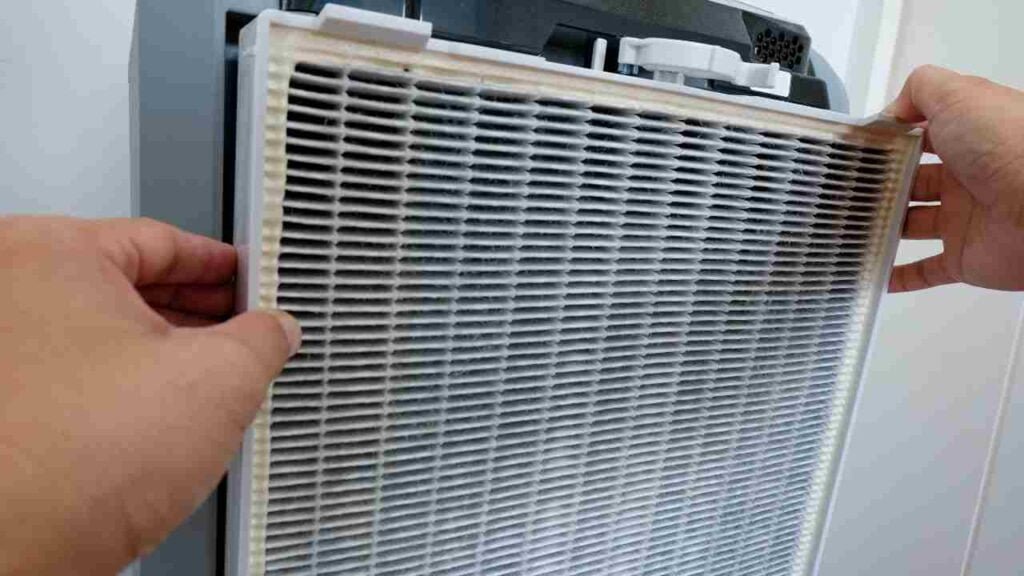
- Remove the filter: Once the compartment is open, gently pull out the filter from its designated slot. Be mindful of any clips or attachments that may secure it.
- Inspect the filter: Take a moment to inspect the filter for visible dirt, dust, or debris. This will give you an idea of how much cleaning is required.
Vacuuming and Brushing the Filter:
Now that you have the filter, it’s time to clean using the power of vacuuming and brushing thoroughly. This step will help remove loose debris and accumulated particles on the filter. Here’s how you can proceed:
1. Start with the vacuum cleaner:
Attach the brush attachment to your vacuum cleaner. Ensure it’s clean and free from any dirt or debris.
2. Gently vacuum the filter:
Hold the filter securely and use the brush attachment to gently vacuum the surface. Move the attachment in a back-and-forth or circular motion, covering the entire filter area. This will help remove larger particles like dust and pet hair.
3. Pay attention to corners and crevices:
Be sure to focus on the corners and edges of the filter, as these areas tend to collect more debris. Use the brush attachment to reach into these tight spots and effectively clean them.
4. Brush away stubborn particles:
If any stubborn particles or dust are clinging to the filter, take your soft brush (such as a clean paintbrush or soft-bristled toothbrush) and gently brush the surface. Use light strokes to dislodge the particles without damaging the filter.
Repeat if necessary: If debris remains on the filter, repeat the vacuuming and brushing process until the filter appears clean and free from visible dirt.
Washing the Filter:
Now that you’ve completed the vacuuming and brushing stage, it’s time to give your Honeywell air purifier filter a deeper clean through washing. This step will help remove any remaining dirt, dust, or residue clinging to the filter. Here’s how you can proceed with washing the filter:
1. Check the manufacturer’s guidelines:
Before proceeding with washing the filter, it’s important to consult the manufacturer’s guide to ensure that the specific model of your Honeywell air purifier is washable. Some filters may not be designed for washing and may require replacement instead.
2. Prepare a mild detergent solution:
Fill a basin or sink with lukewarm water. Add a small amount of mild detergents, such as dish soap or a gentle laundry detergent. Mix the solution gently to create a soapy mixture.
3. Immerse the filter:
Submerge the filter completely into the soapy water solution. Ensure the entire filter is submerged, allowing the detergent to penetrate and loosen any dirt or residue.
4. Gently agitate the filter:
Use your hands to gently agitate the filter in the soapy water. Lightly swish it back and forth to help dislodge any stubborn particles. Be careful not to apply excessive force or scrub aggressively, as this can damage the filter.
5. Rinse thoroughly:
Once you’ve agitated the filter, remove it from the soapy water and thoroughly under cool, running water. Continue rinsing until the water runs clear, indicating that all the detergent and debris have been washed away.
6. Squeeze out excess water:
After rinsing, gently squeeze the filter to remove excess water. Avoid twisting or wringing the filter, as this can cause damage. Instead, apply light pressure to squeeze out the water.
7. Allow the filter to air dry:
Find a well-ventilated area and place the filter on a clean, dry surface. Let it air dry completely before proceeding with reinstallation. This process may take several hours, so be patient and ensure the filter is completely dry to prevent mold or mildew growth.
Drying and Reinstalling the Filter:
Now that you’ve given your Honeywell air purifier filter a good wash, it’s time to move on to the next step: drying and reinstalling the filter. Proper drying is essential to ensure the filter is completely moisture-free before returning to your air purifier. Follow these steps for a seamless drying and reinstallation process:
1. Find a well-ventilated area:
Locate a clean and well-ventilated space where you can safely dry the filter. Choosing a spot away from direct sunlight and excessive humidity is important.
2. Place the filter on a clean surface:
Lay the washed filter on a clean, dry surface. Avoid using paper towels or cloth that may leave behind lint. Opt for a lint-free cloth or a drying rack.
3. Let it air dry:
Allow the filter to air dry naturally. This may take several hours or even overnight, depending on the ambient conditions. Avoid using heat sources such as hairdryers or heaters, as excessive heat can damage the filter.
4. Check for complete dryness:
Before reinstalling the filter, ensure it is completely dry to the touch. Lightly touch the filter’s surface to verify that no moisture remains. Any residual moisture can lead to mold or mildew growth and compromise the filter’s effectiveness.
5. Reinstall the filter:
Once thoroughly dry, carefully place it back into its designated slot in the Honeywell air purifier. Make sure it is aligned correctly and securely positioned. Follow any specific instructions mentioned in the manufacturer’s guide.
Close the filter compartment securely, ensuring it’s properly latched or locked. This will help maintain a tight seal and optimize the air purifier’s performance.
Conclusion:
In conclusion, cleaning and maintaining your Honeywell air purifier filter is a small but significant investment in your indoor air quality. Following the step-by-step process outlined in this guide, you can ensure your filter is free from dirt, dust, and debris, allowing your air purifier to work efficiently and effectively.
Remember to gather your cleaning tools, remove the filter, vacuum and brush it gently, wash it with a mild detergent, and let it air dry completely before reinstalling. Additionally, implementing regular filter inspections and adhering to the manufacturer’s guidelines for maintenance and replacement will help keep your air purifier running smoothly.
